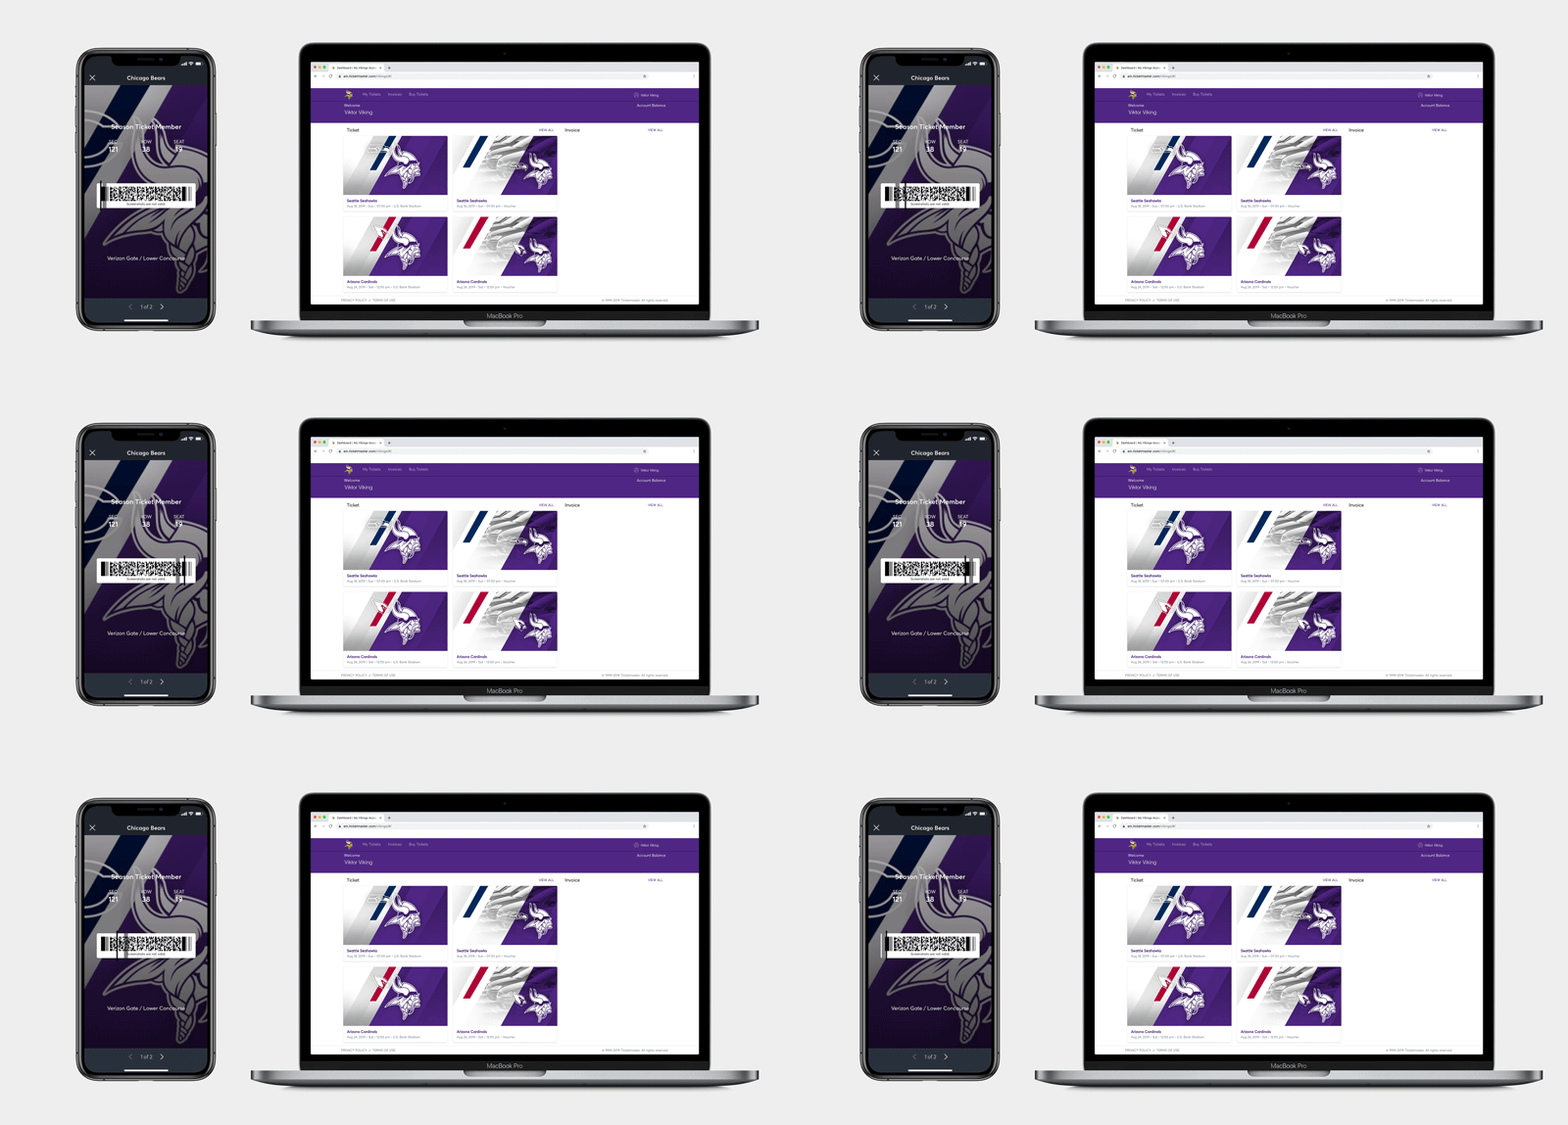
VIKINGS APP INSTRUCTIONS

Accessing Your Secure Digital Tickets

Step 1

Step 1

Open up the Vikings App and select Tickets in the lower menu

Step 2

Step 2

Select Access Tickets to log in to your account

Step 3

Step 3

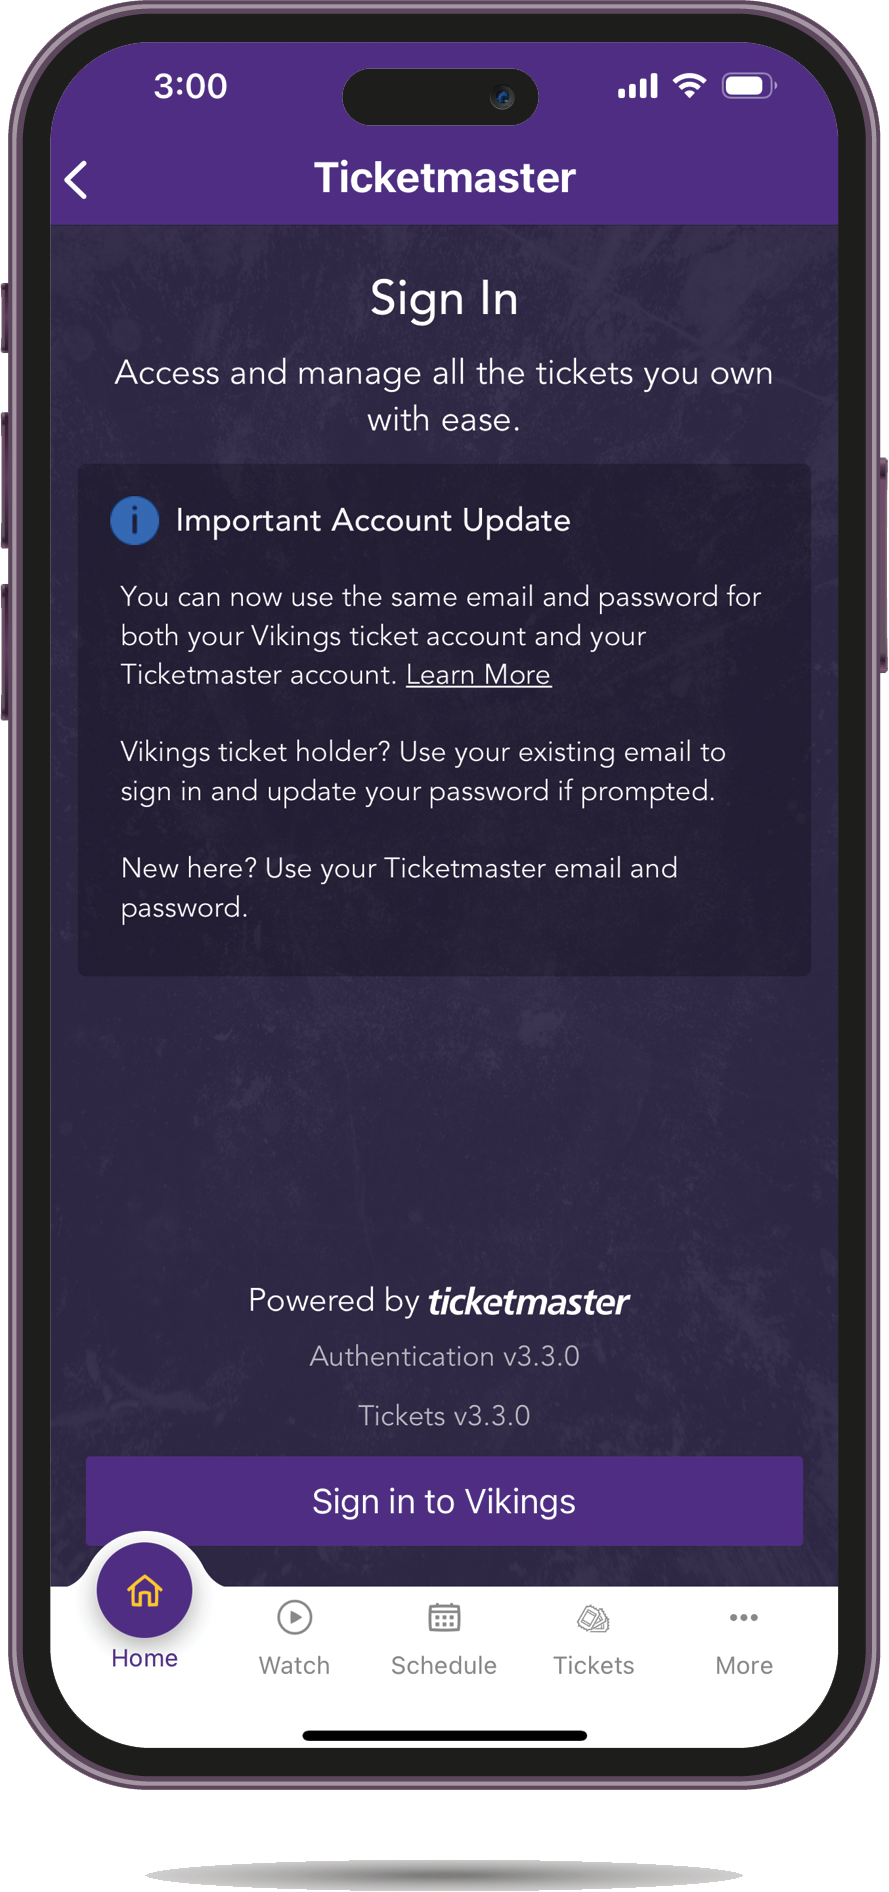
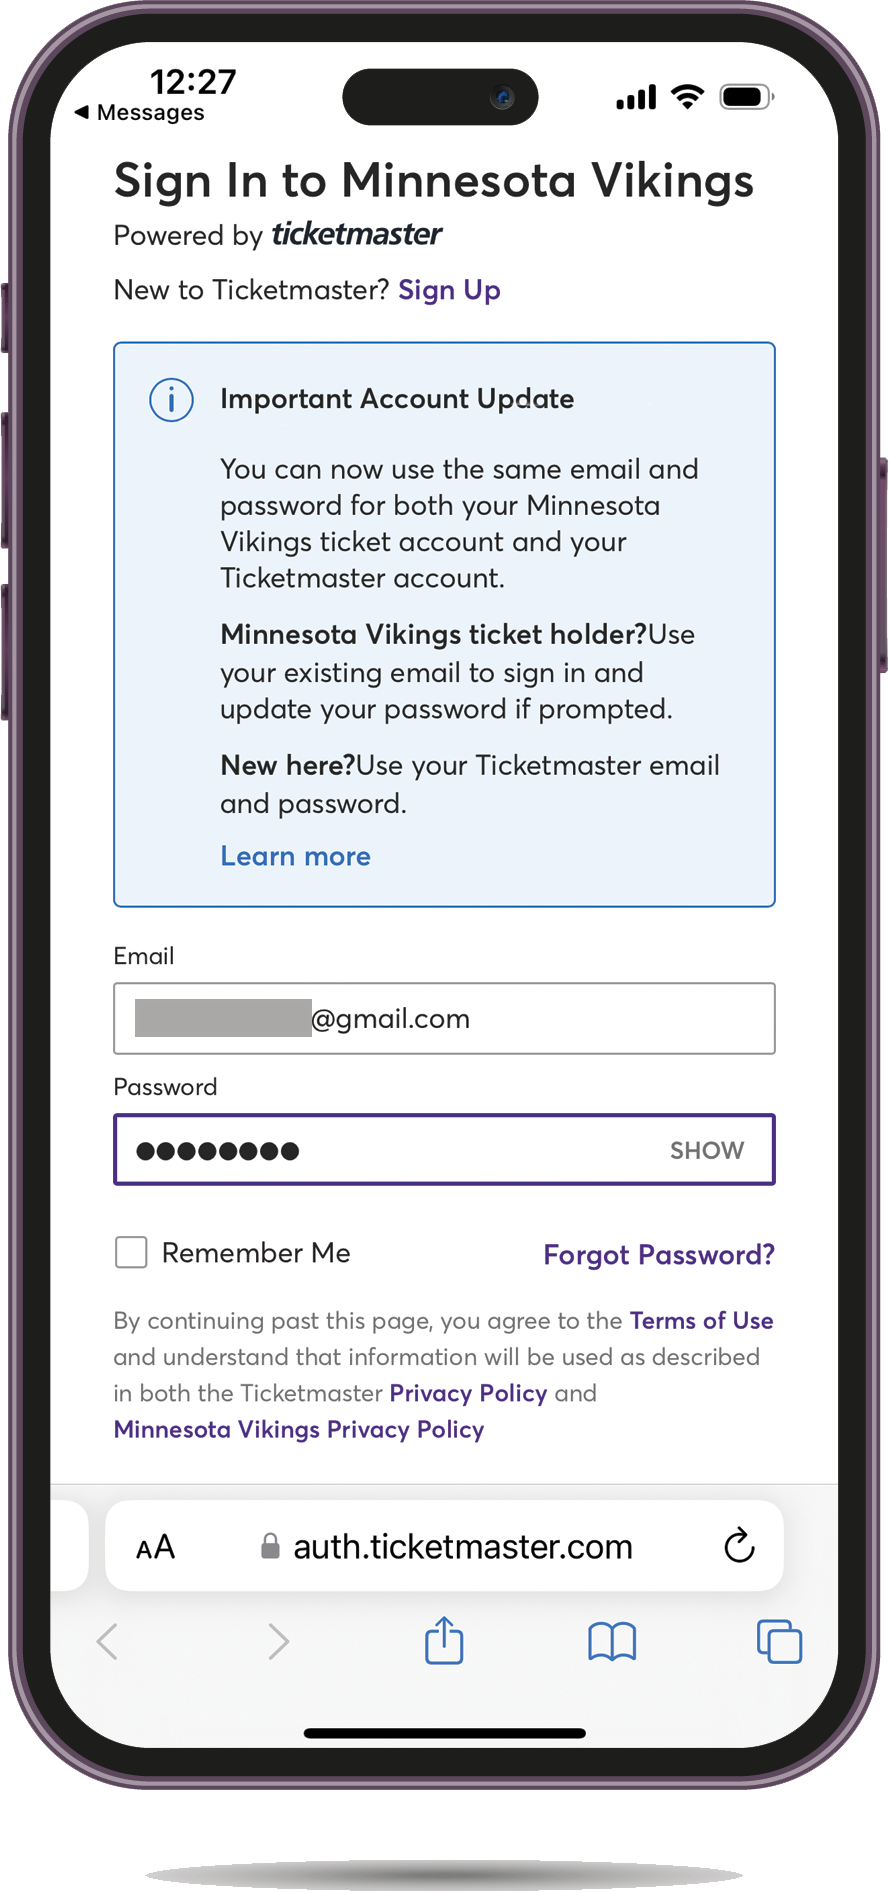
Select Sign In to Vikings

Step 4

Step 4

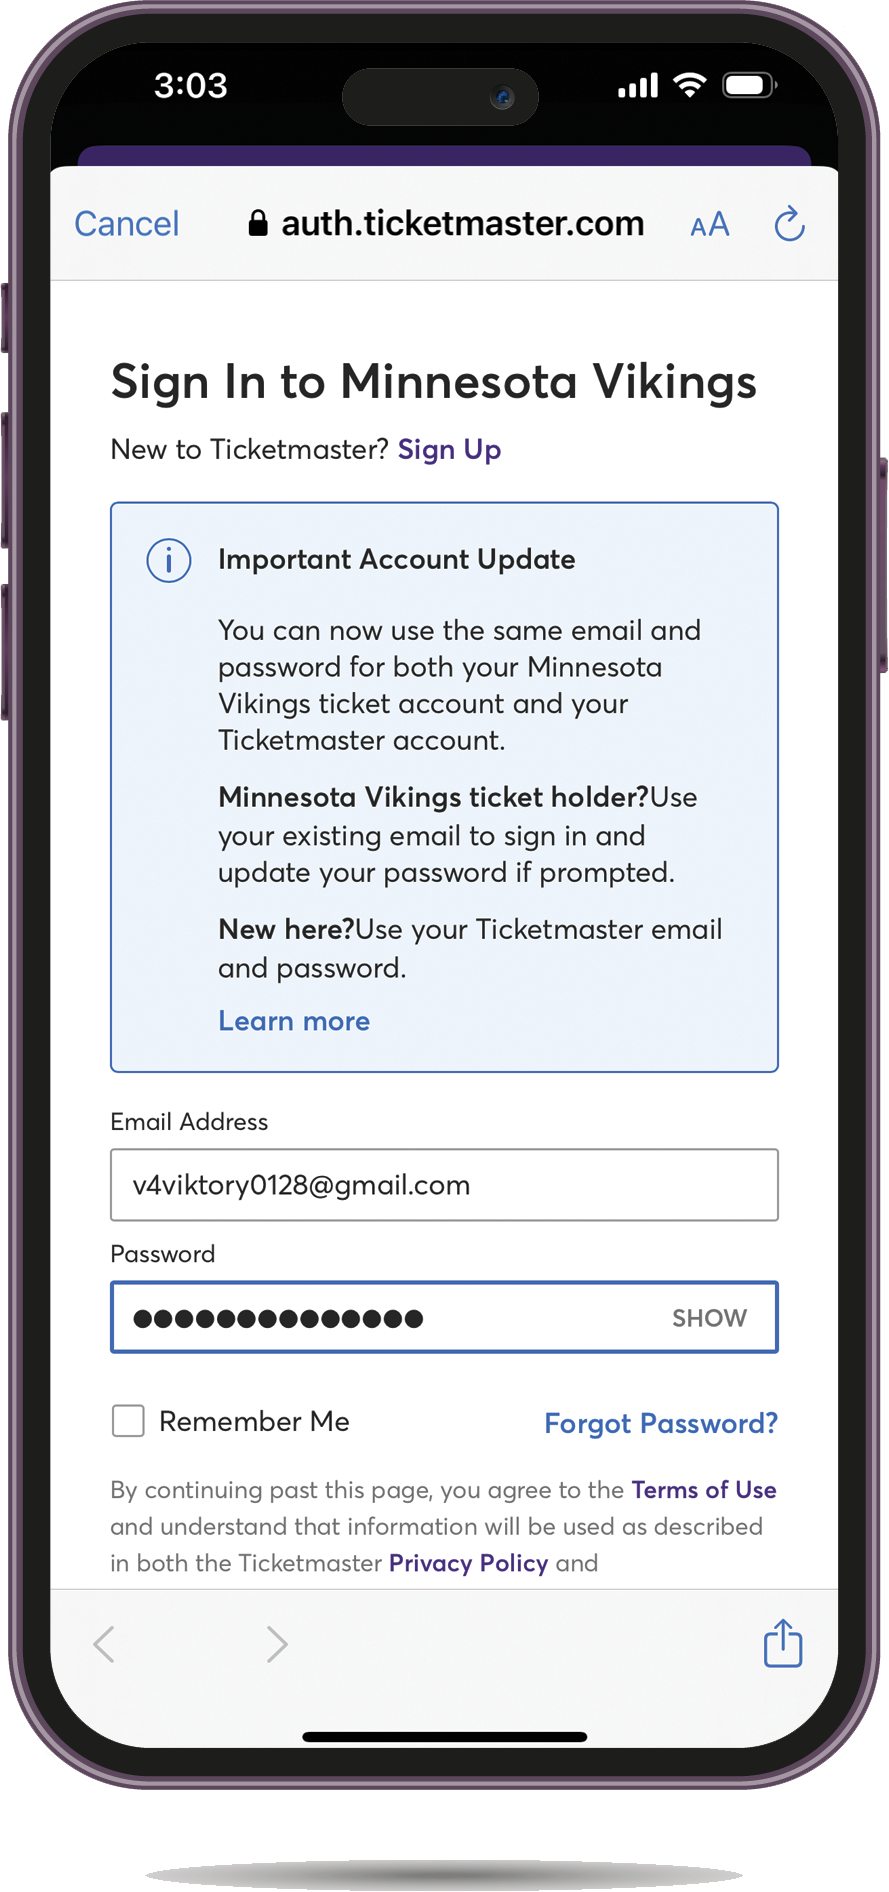
Enter your username and password

Step 5

Step 5

Link your account to your Ticketmaster account to view your tickets

Step 6

Step 6

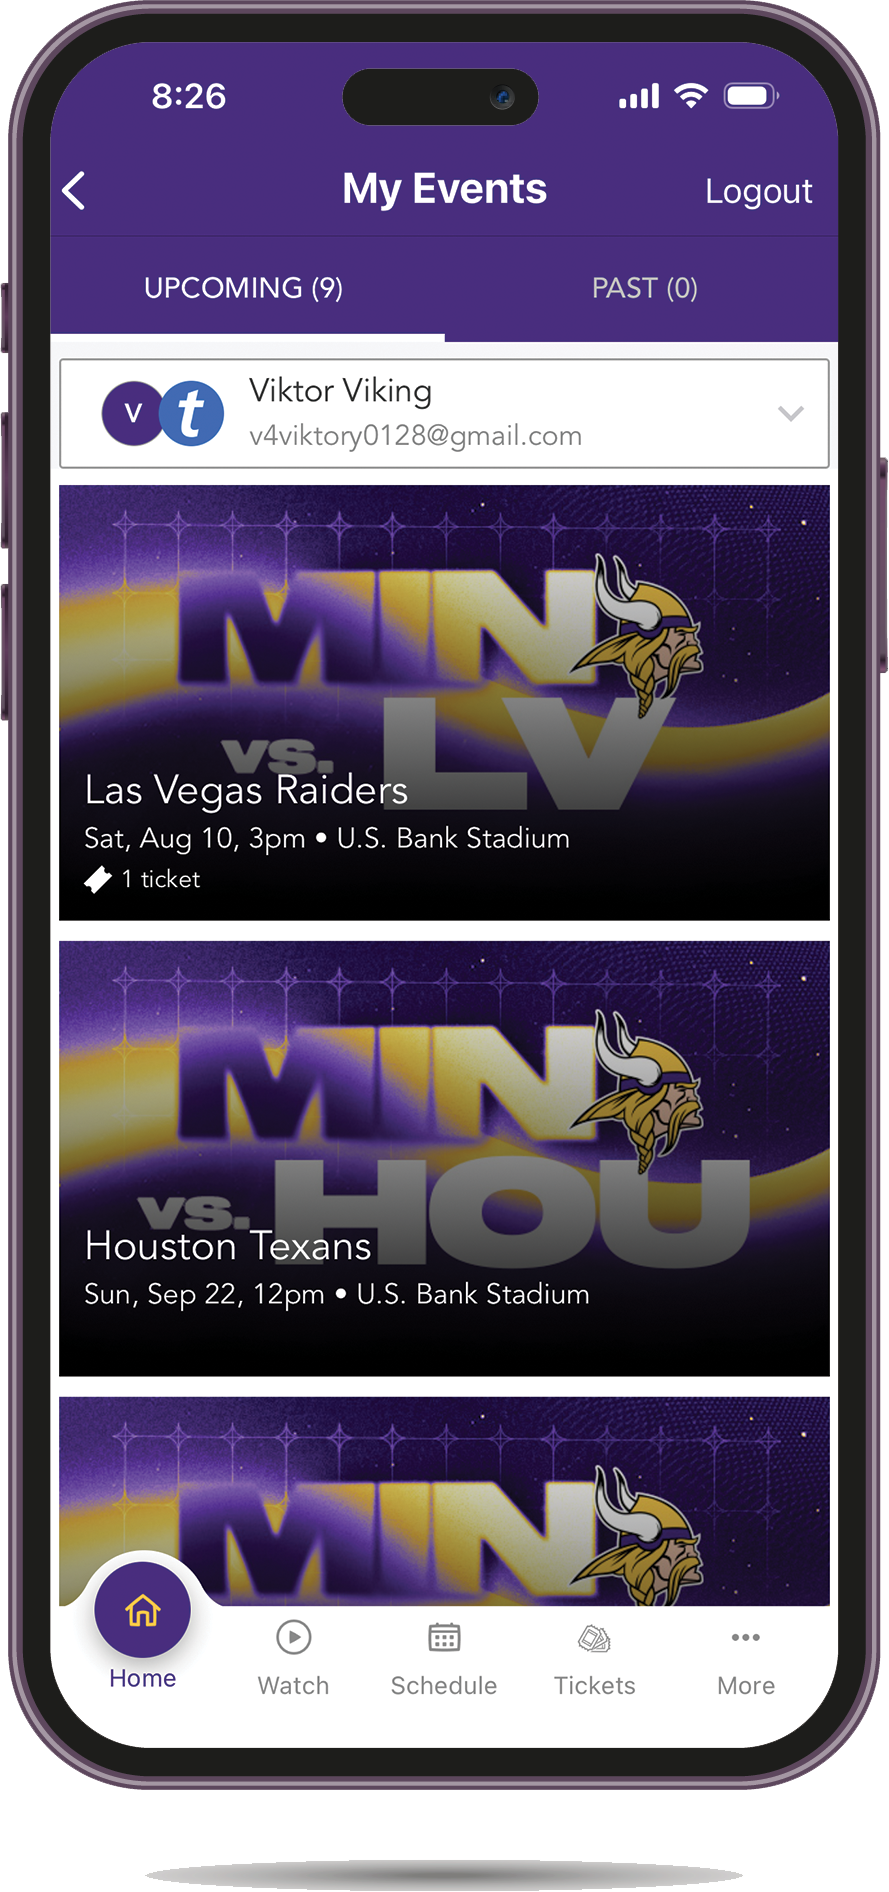
Select the event you wish to manage or view

Step 7

Step 7

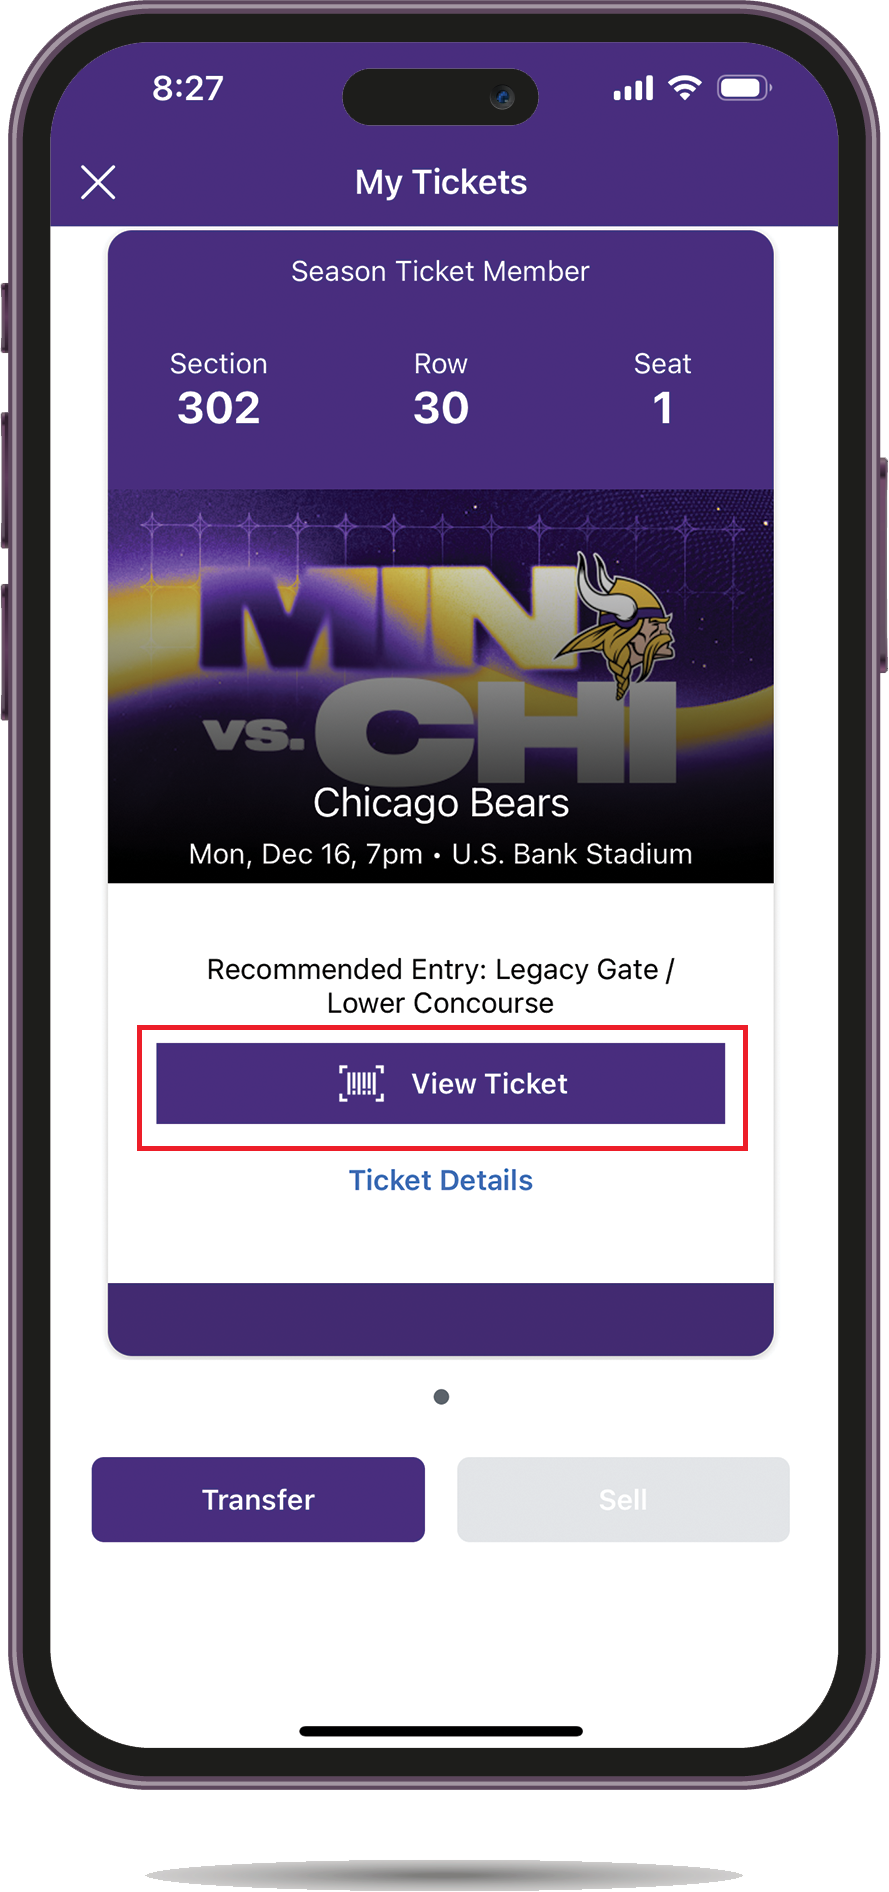
View your ticket barcode or add to your wallet

Tip: Be sure you have a full battery charge before heading to the event.

Adding Your Tickets to Apple Wallet

Step 1

Step 1

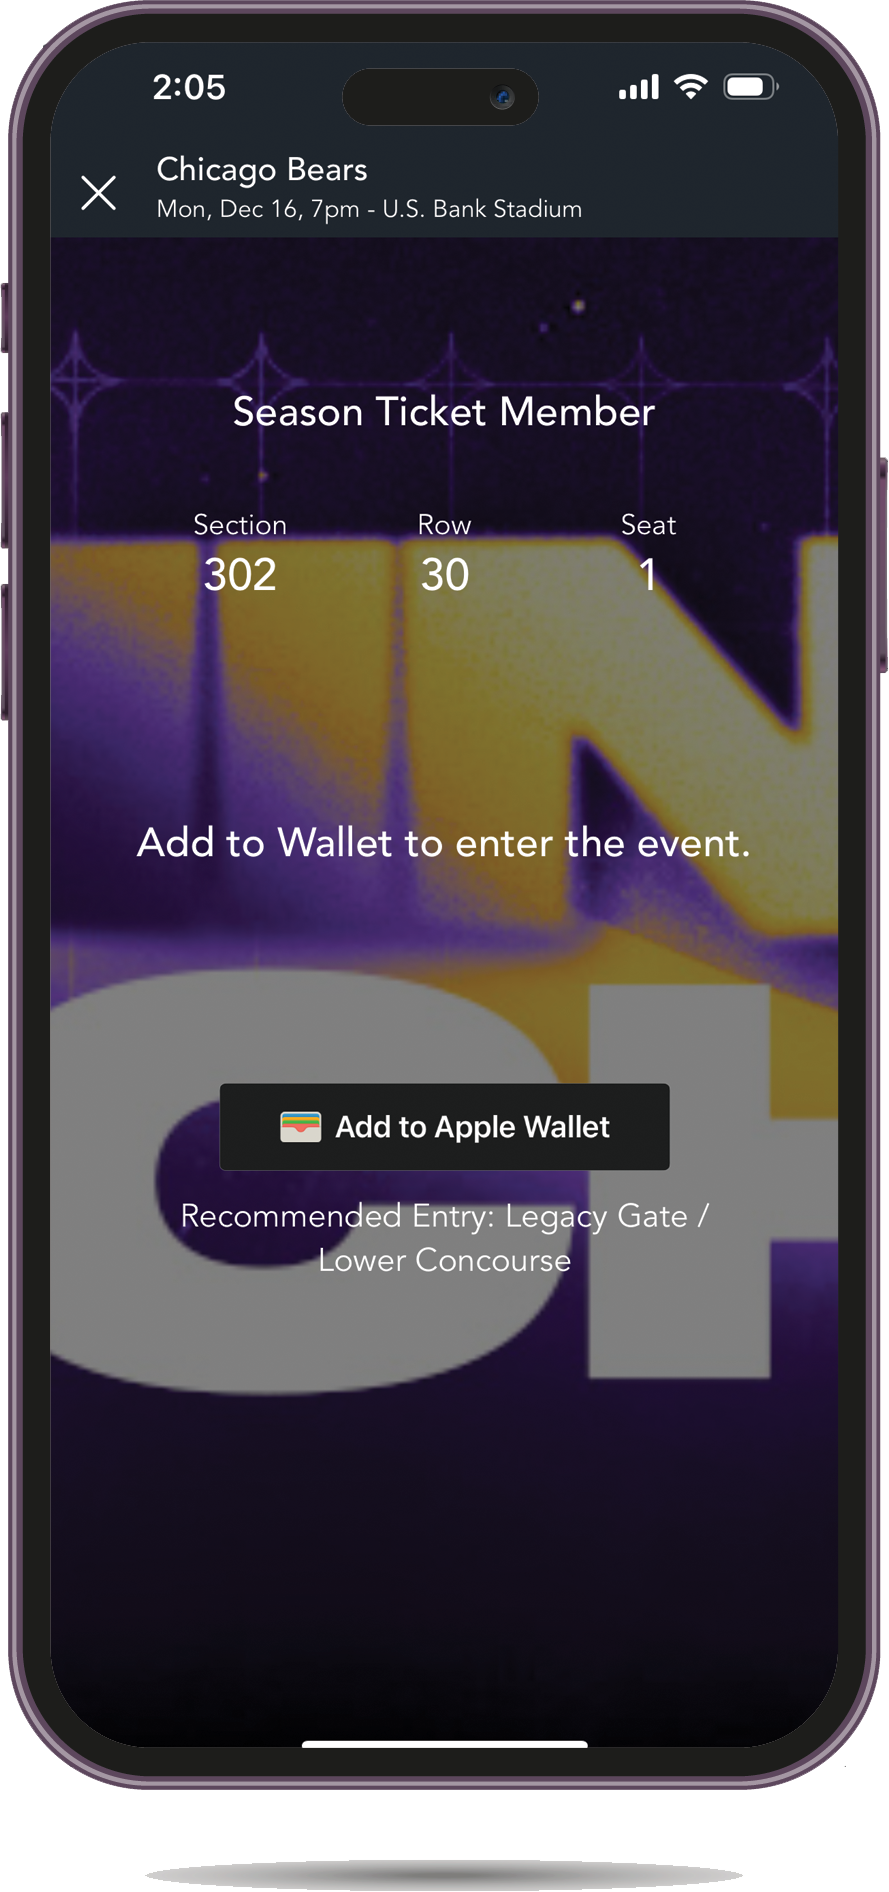
When in your event, select Add to Wallet

Step 2

Step 2

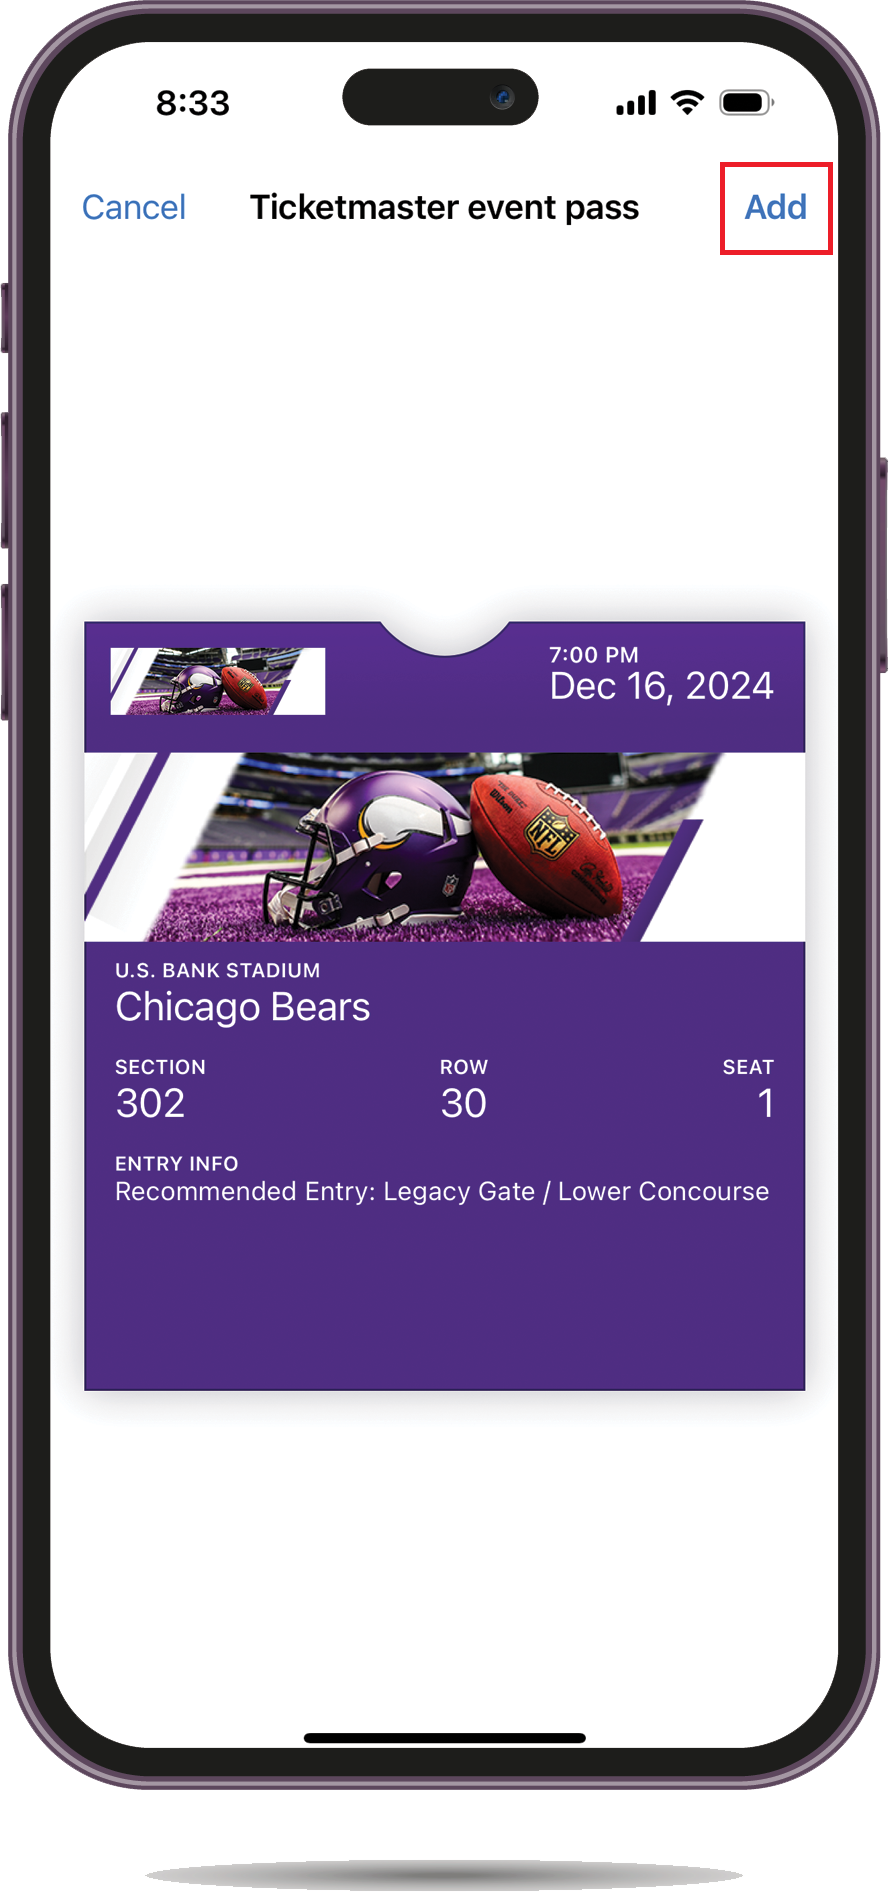
Select Add in the upper right corner and follow the steps given by your device

Step 3

Step 3

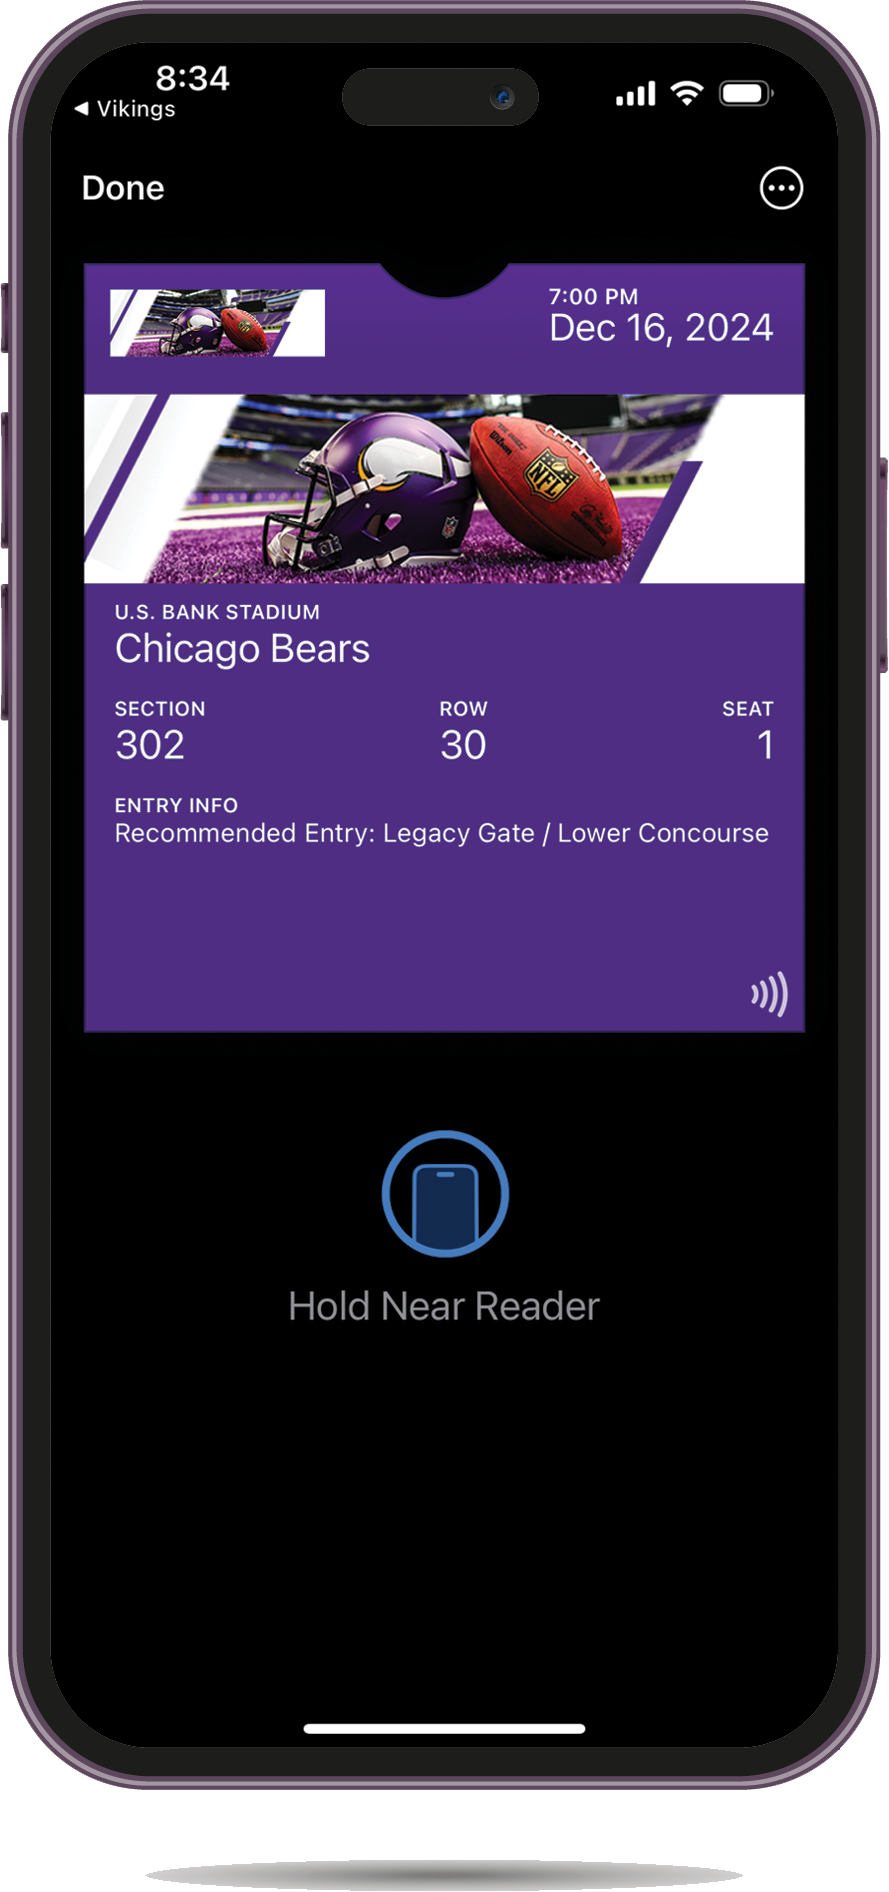
Select View in Wallet to see your ticket. This is your ticket and can be scanned in at the gate

Tip: When approaching the gate, tap the notification, or open Wallet, to select the ticket(s) and hold top of iPhone near the scanner.

Transfer Your Tickets

Step 1

Step 1

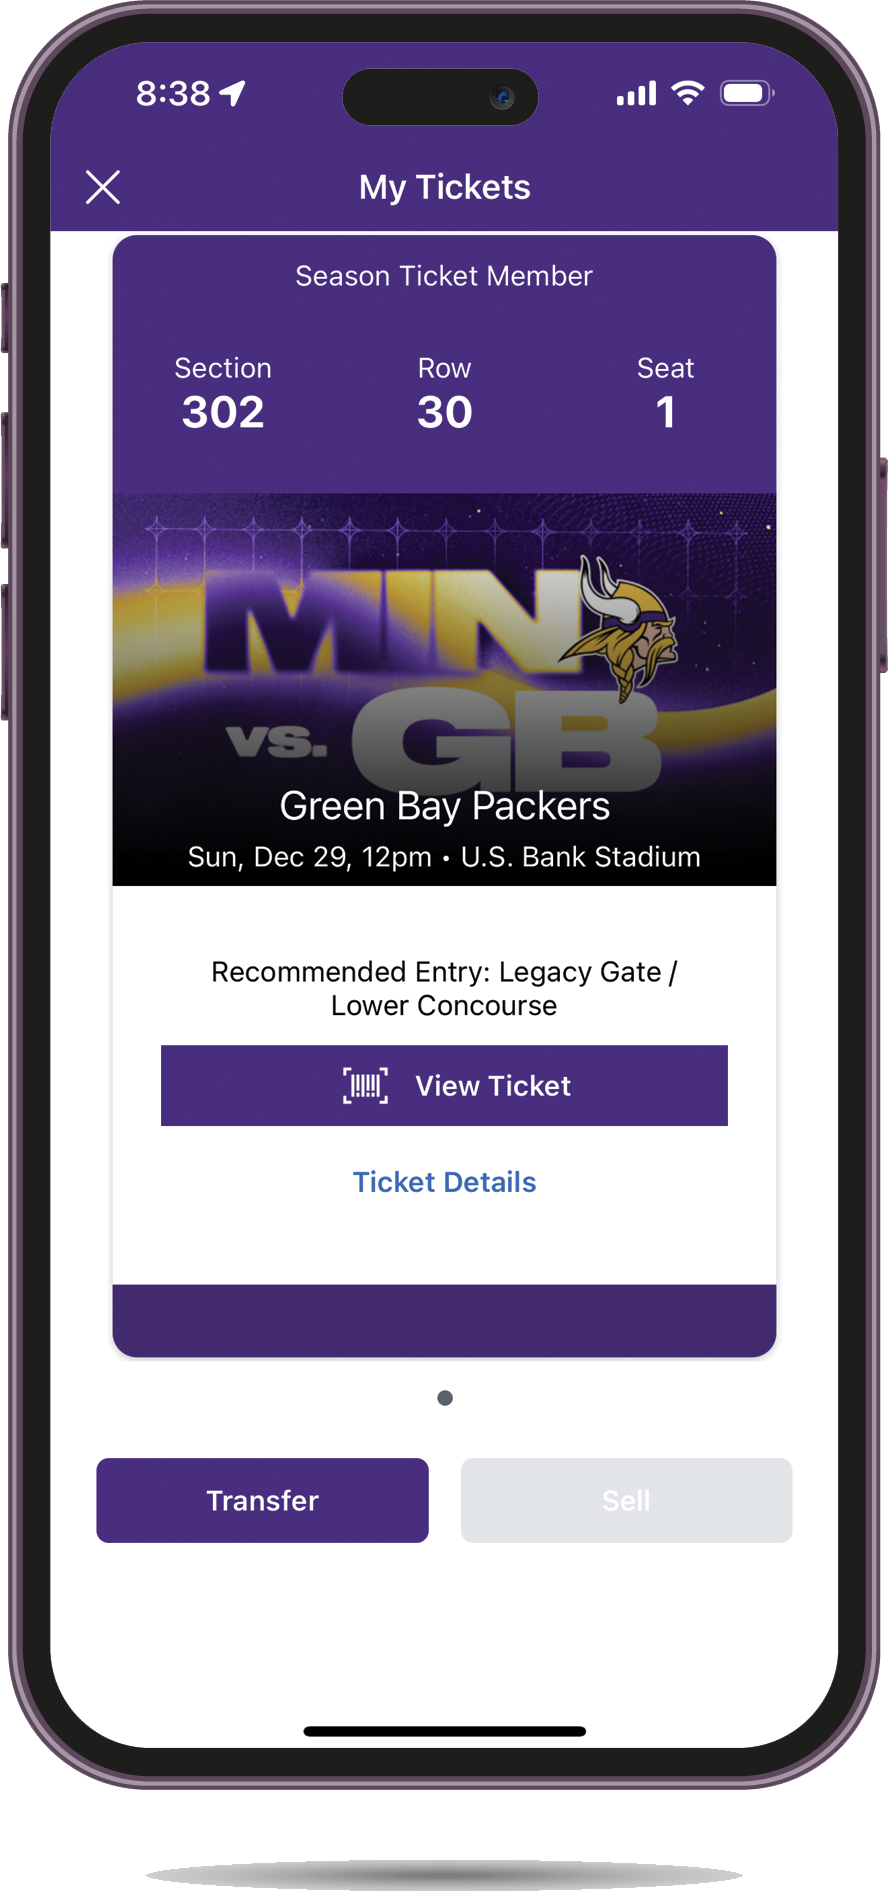
Select the event you wish to transfer and select the transfer button.

Step 2

Step 2

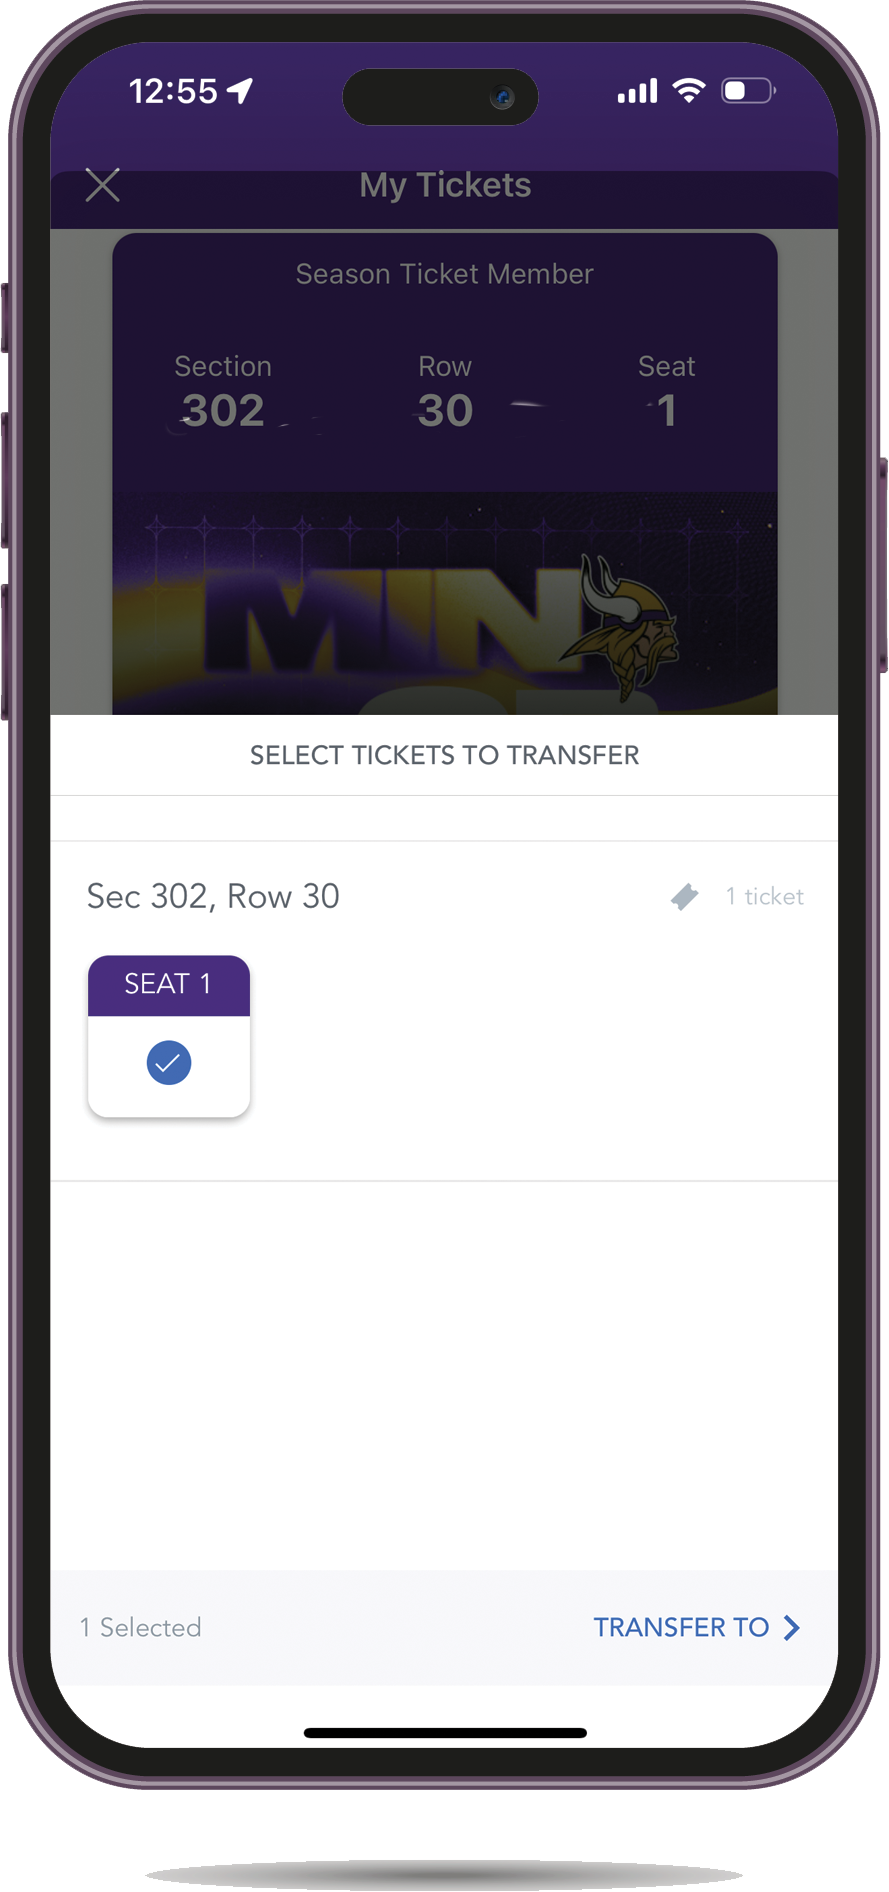
Select the seat(s) and then click the Transfer To button.

Step 3

Step 3

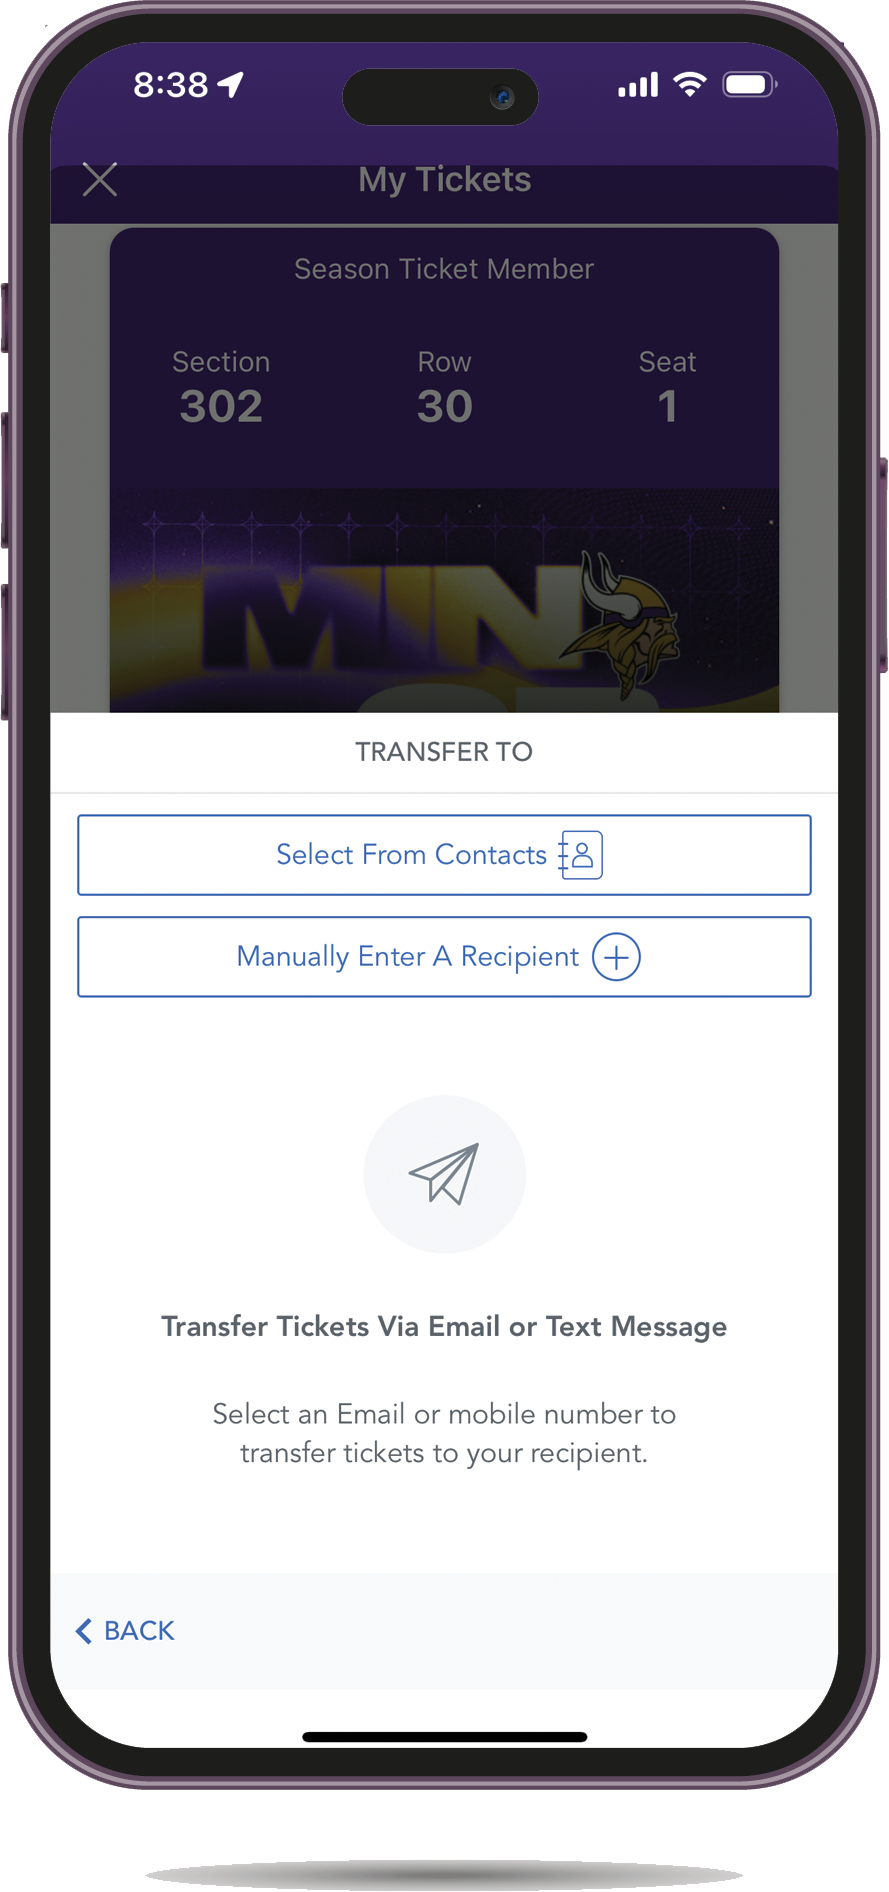
Choose how you want to transfer the ticket(s) and enter the contact details, if needed.

Step 4

Step 4

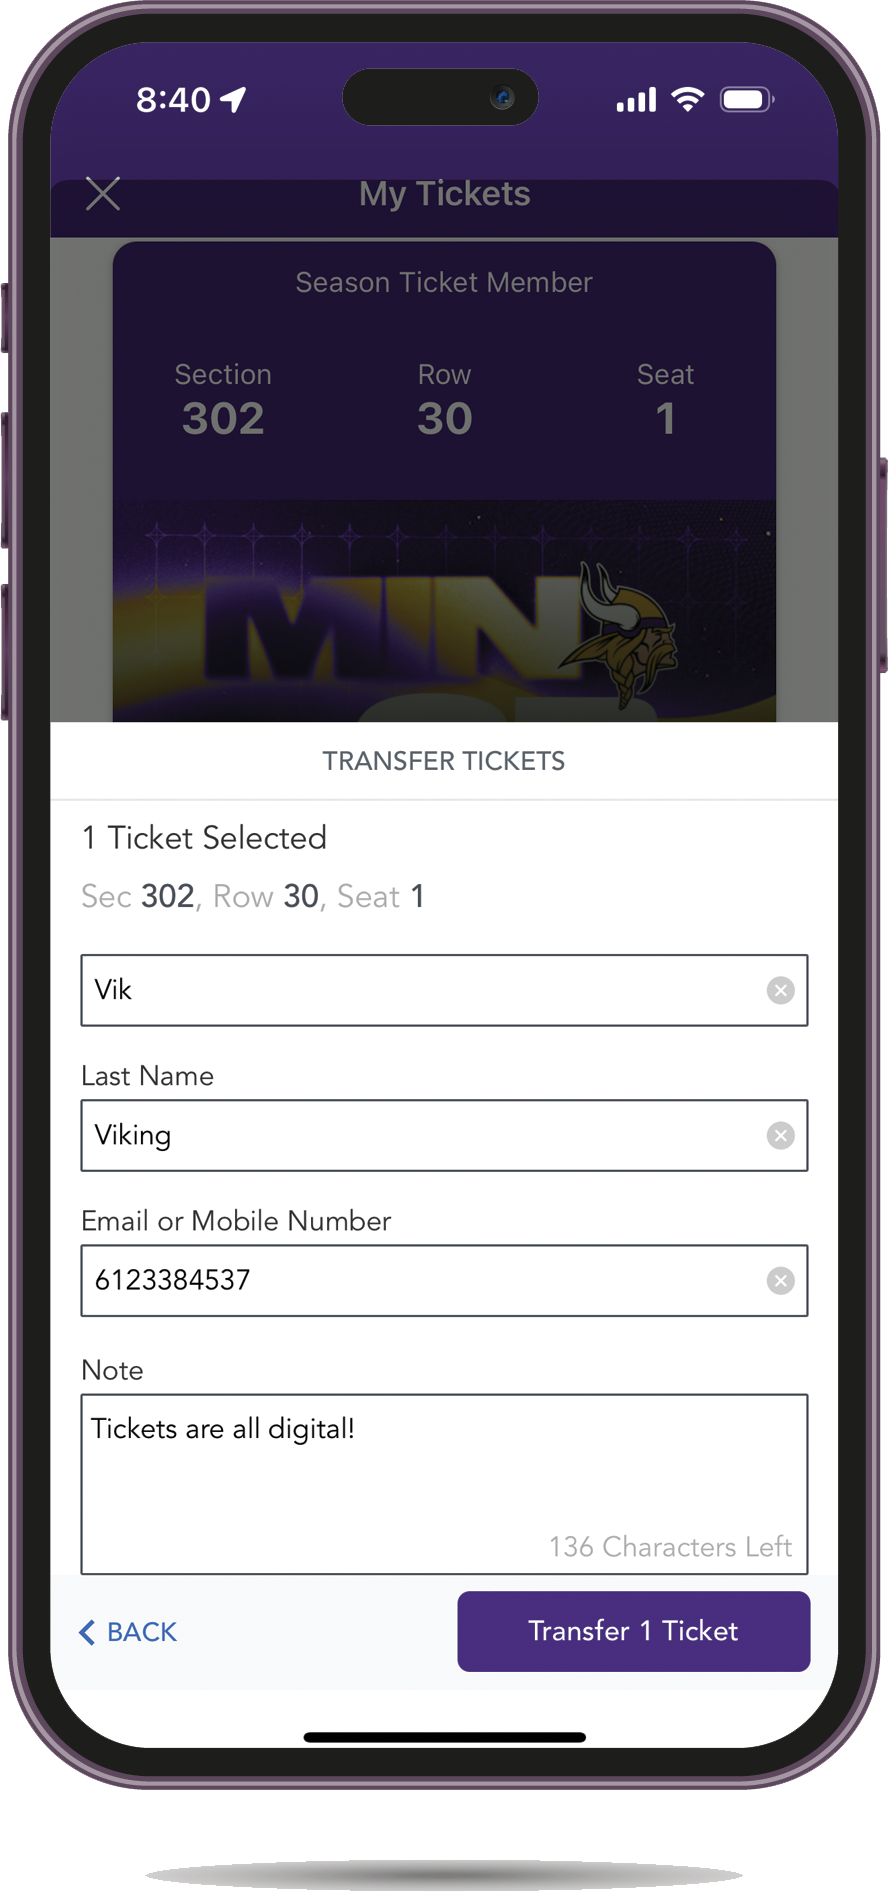
Select the Transfer Ticket button to initiate the transfer (if sent via email, this will send the ticket, you can disregard the next step)

Step 5

Step 5

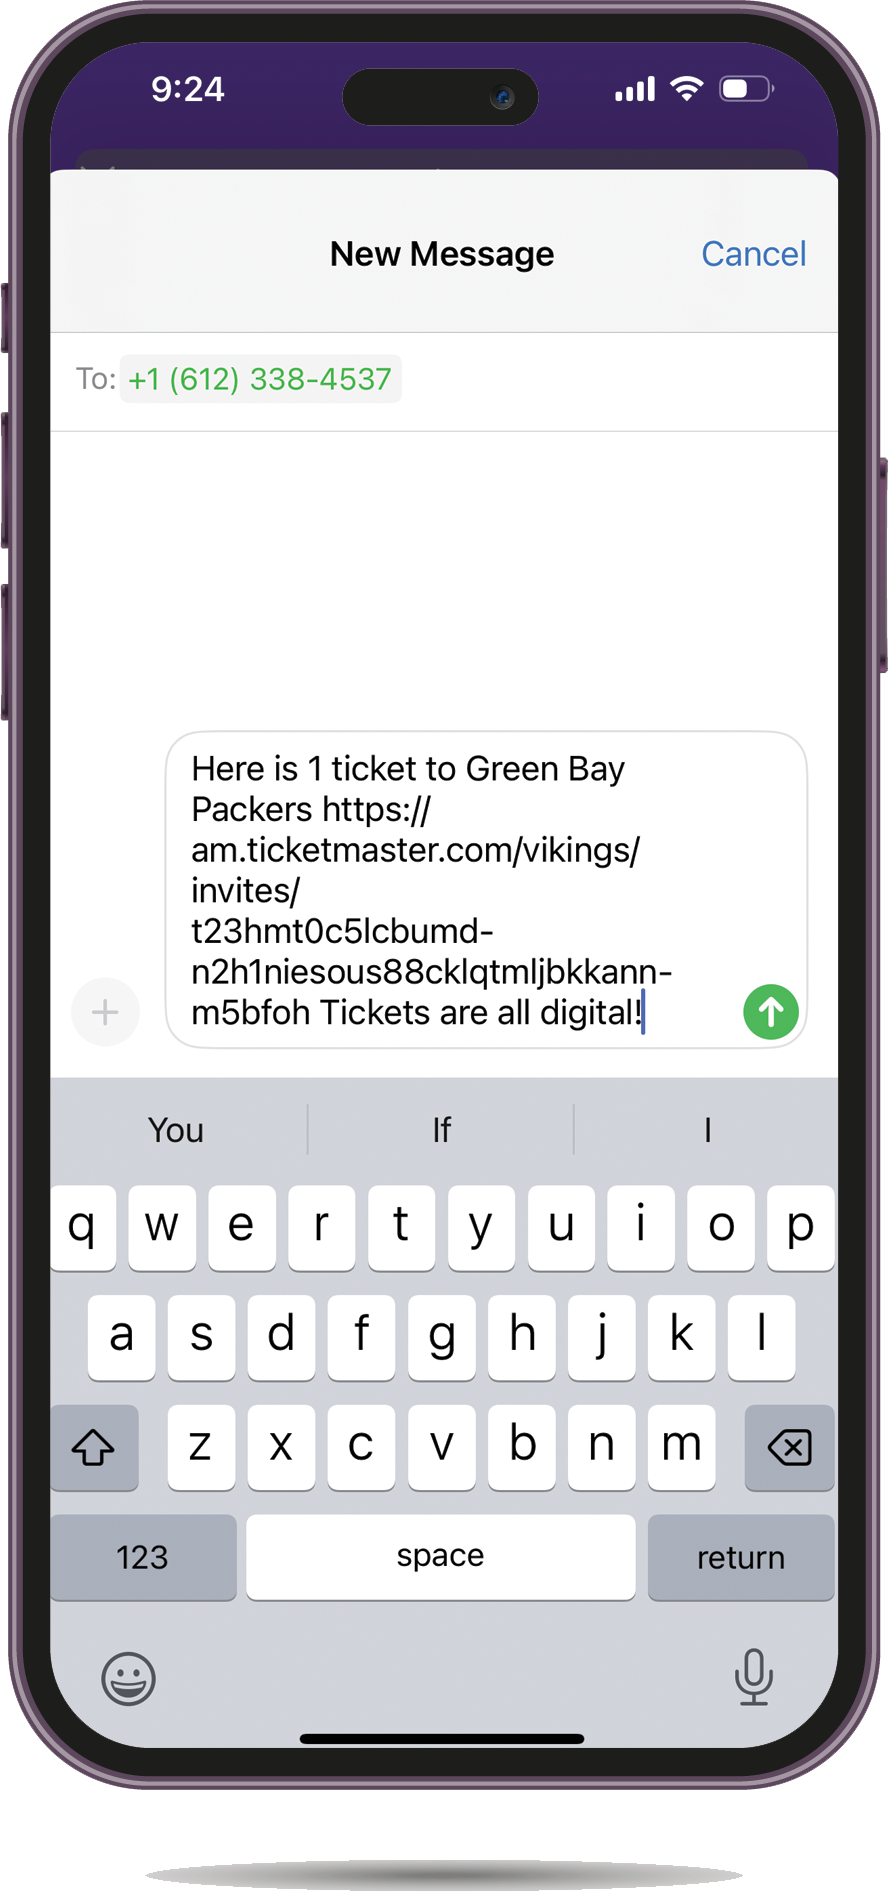
If sending the ticket via text message, your message will be generated to the recipient, make sure you send the message to finalize the transfer.

When transferring tickets, you will receive two (2) emails from Ticketmaster: one confirming your ticket(s) have been sent and another when your recipient accepts the tickets you sent.

Your recipient will also receive an email from Ticketmaster prompting them to accept your tickets.

Once the ticket transfer has been accepted, the tickets in your account are no longer valid and you will not be able to get into the event with those tickets. You may not cancel the transfer if the tickets have been accepted.

Accept Your Ticket Transfer

Step 1

Step 1

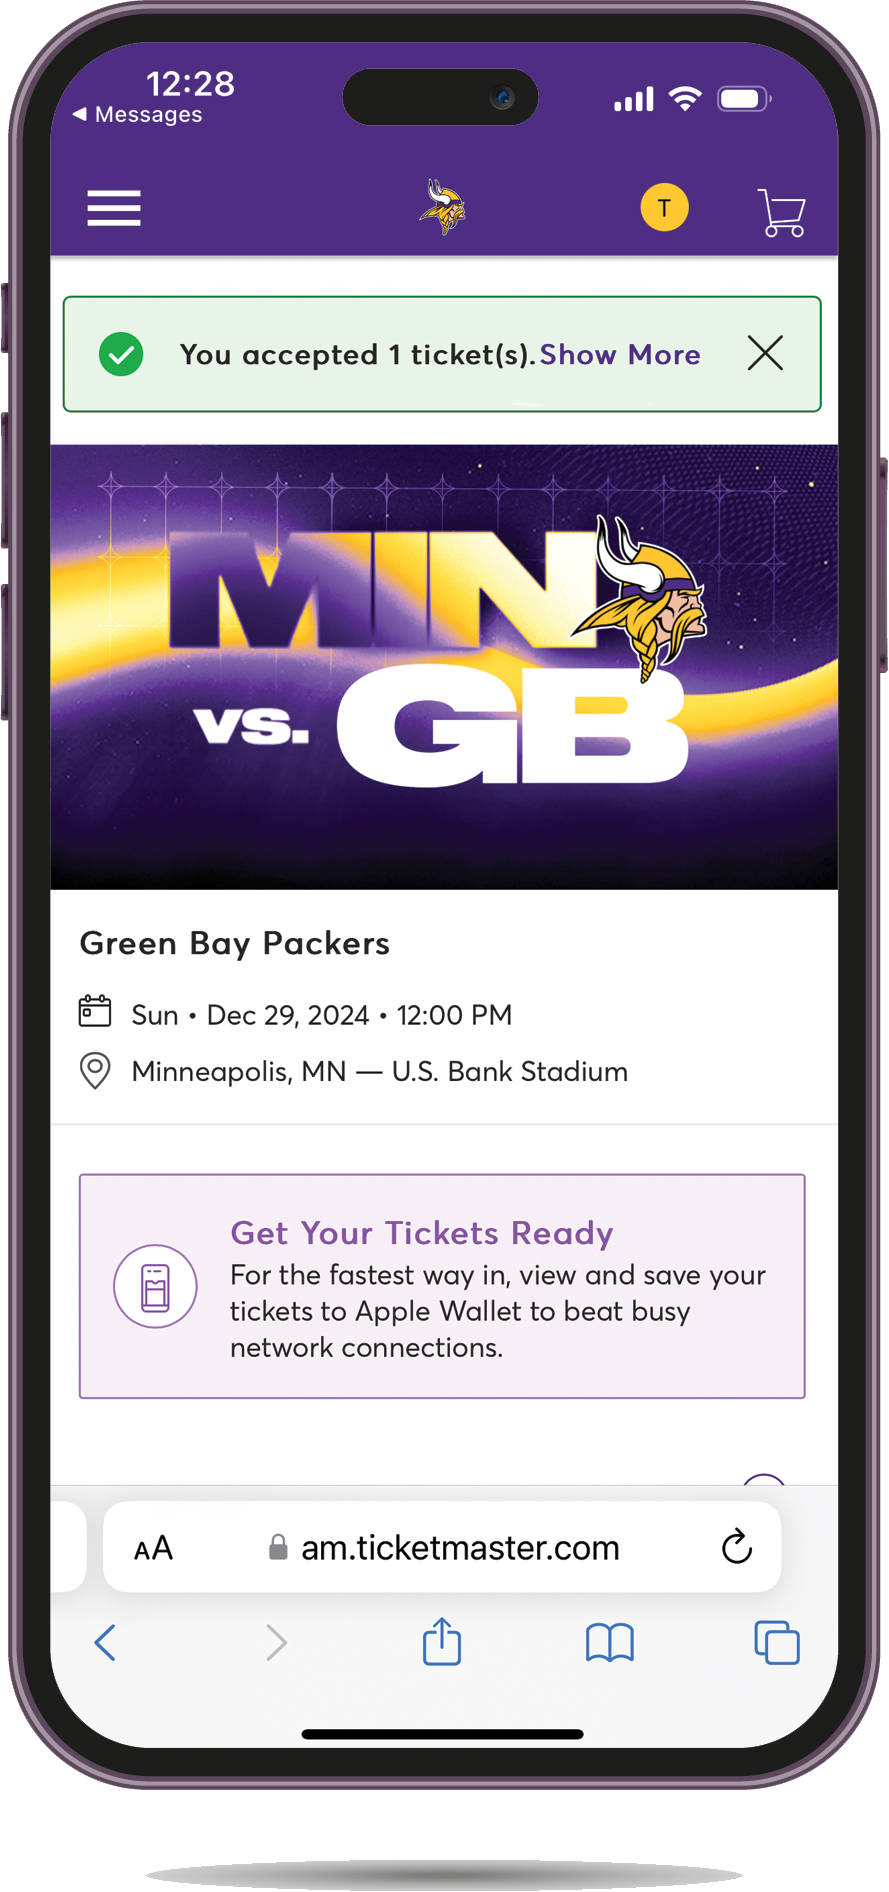
Select the link in the text message you received (if the tickets were transferred via email, find the email and select the button to accept tickets)

Step 2

Step 2

Log in or create your account.

Step 3

Step 3

Once logged in, the tickets will automatically be accepted! Review your location and use the Vikings App to scan in on game day.

Please Note: You must login with the same account your tickets were emailed to.

If you need to create an account use the same email address you received your tickets at.

Once you accept a ticket transfer, the email link or text link expires. Log in to the Vikings App to view your barcodes.

Cancel Ticket Transfer

Step 1

Step 1

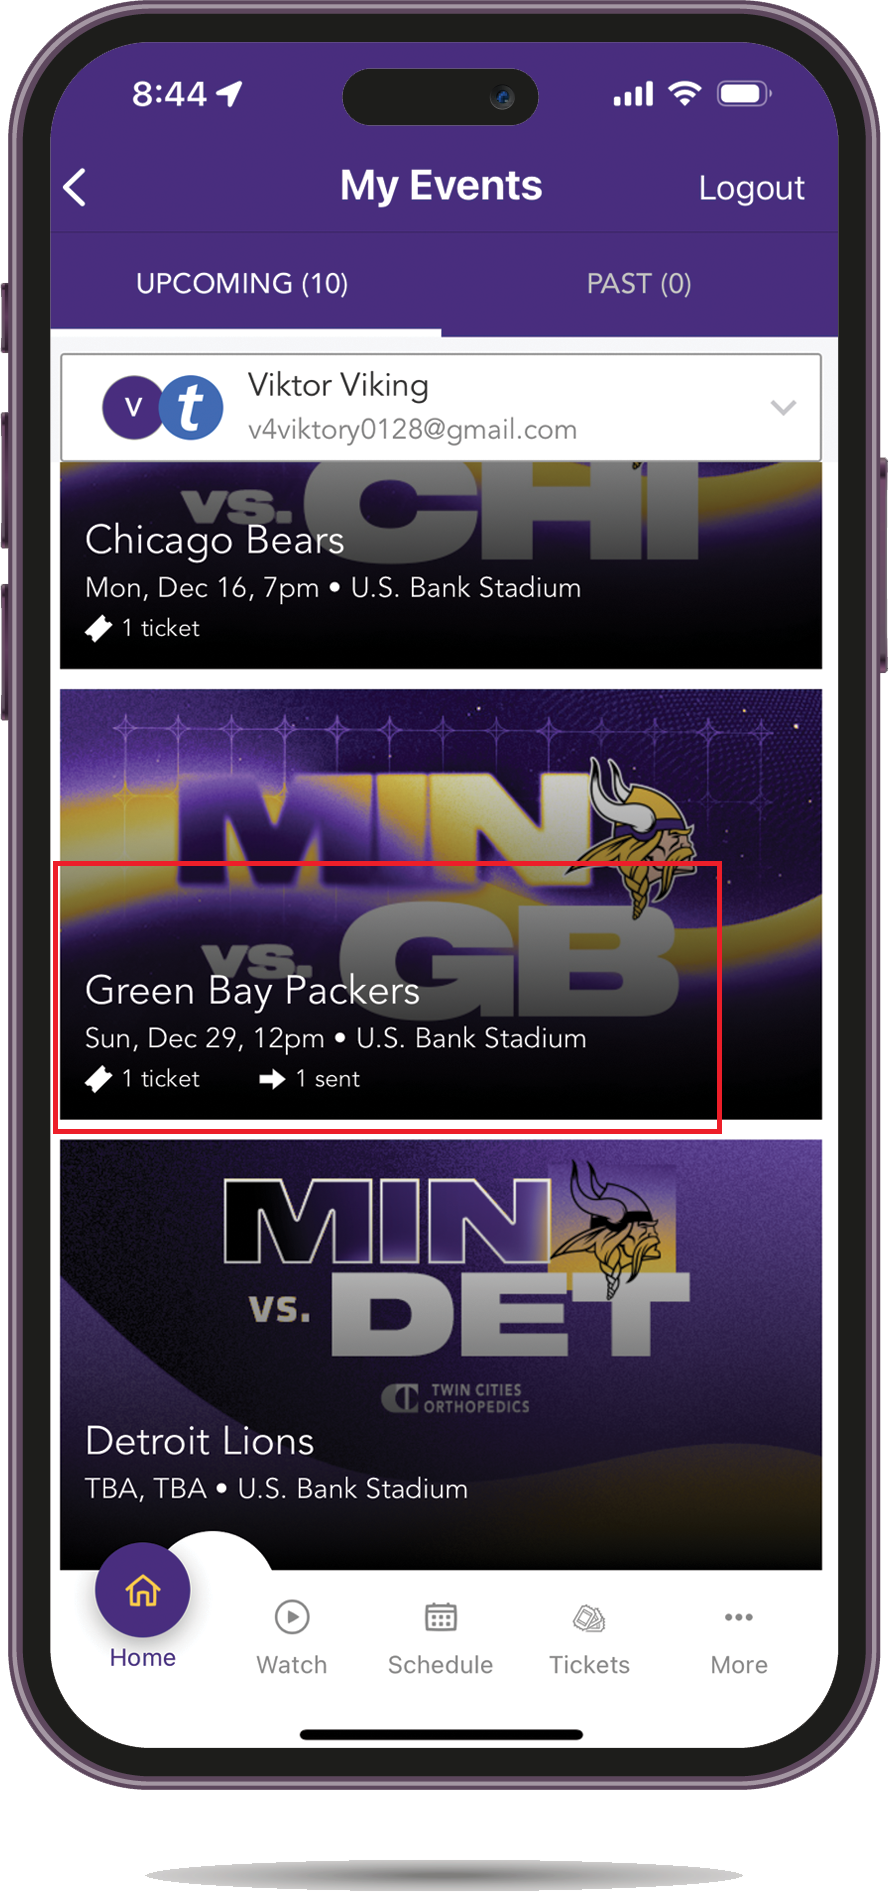
Select the event you want to reclaim.

Step 2

Step 2

Select the Cancel Transfer button.

Step 3

Step 3

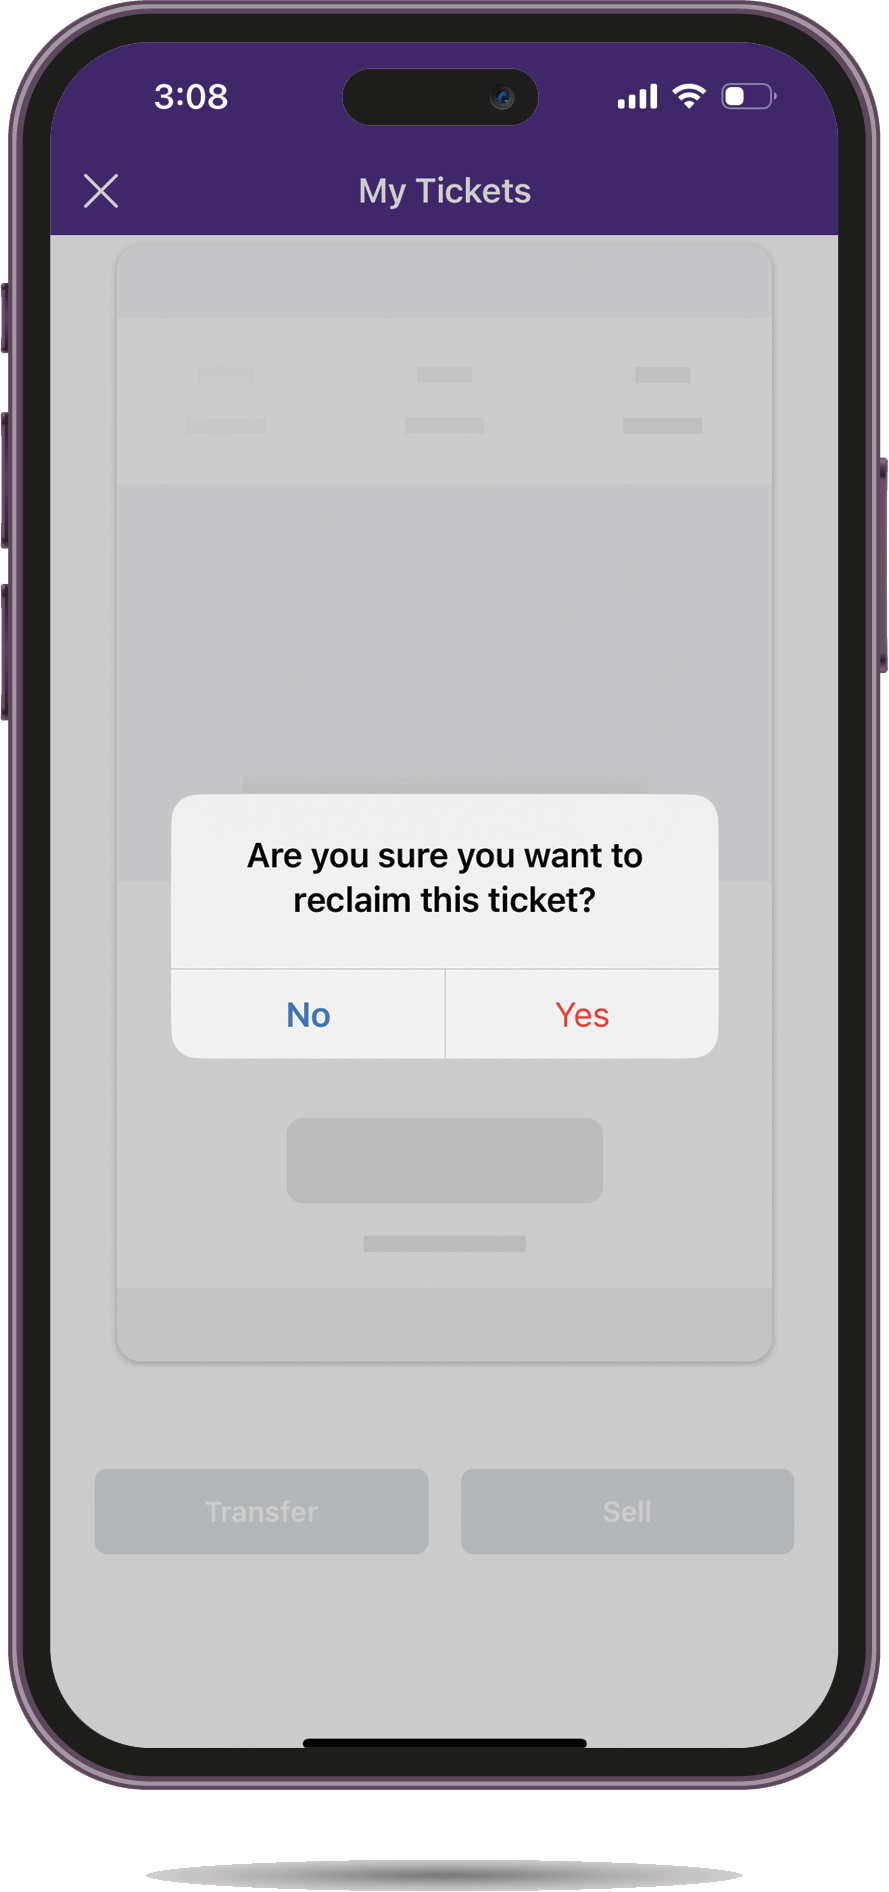
When prompted to reclaim, select Yes to bring the ticket back to your account.

Please Note: You may not cancel the transfer if the tickets have been accepted.

Sell Your Tickets

Step 1

Step 1

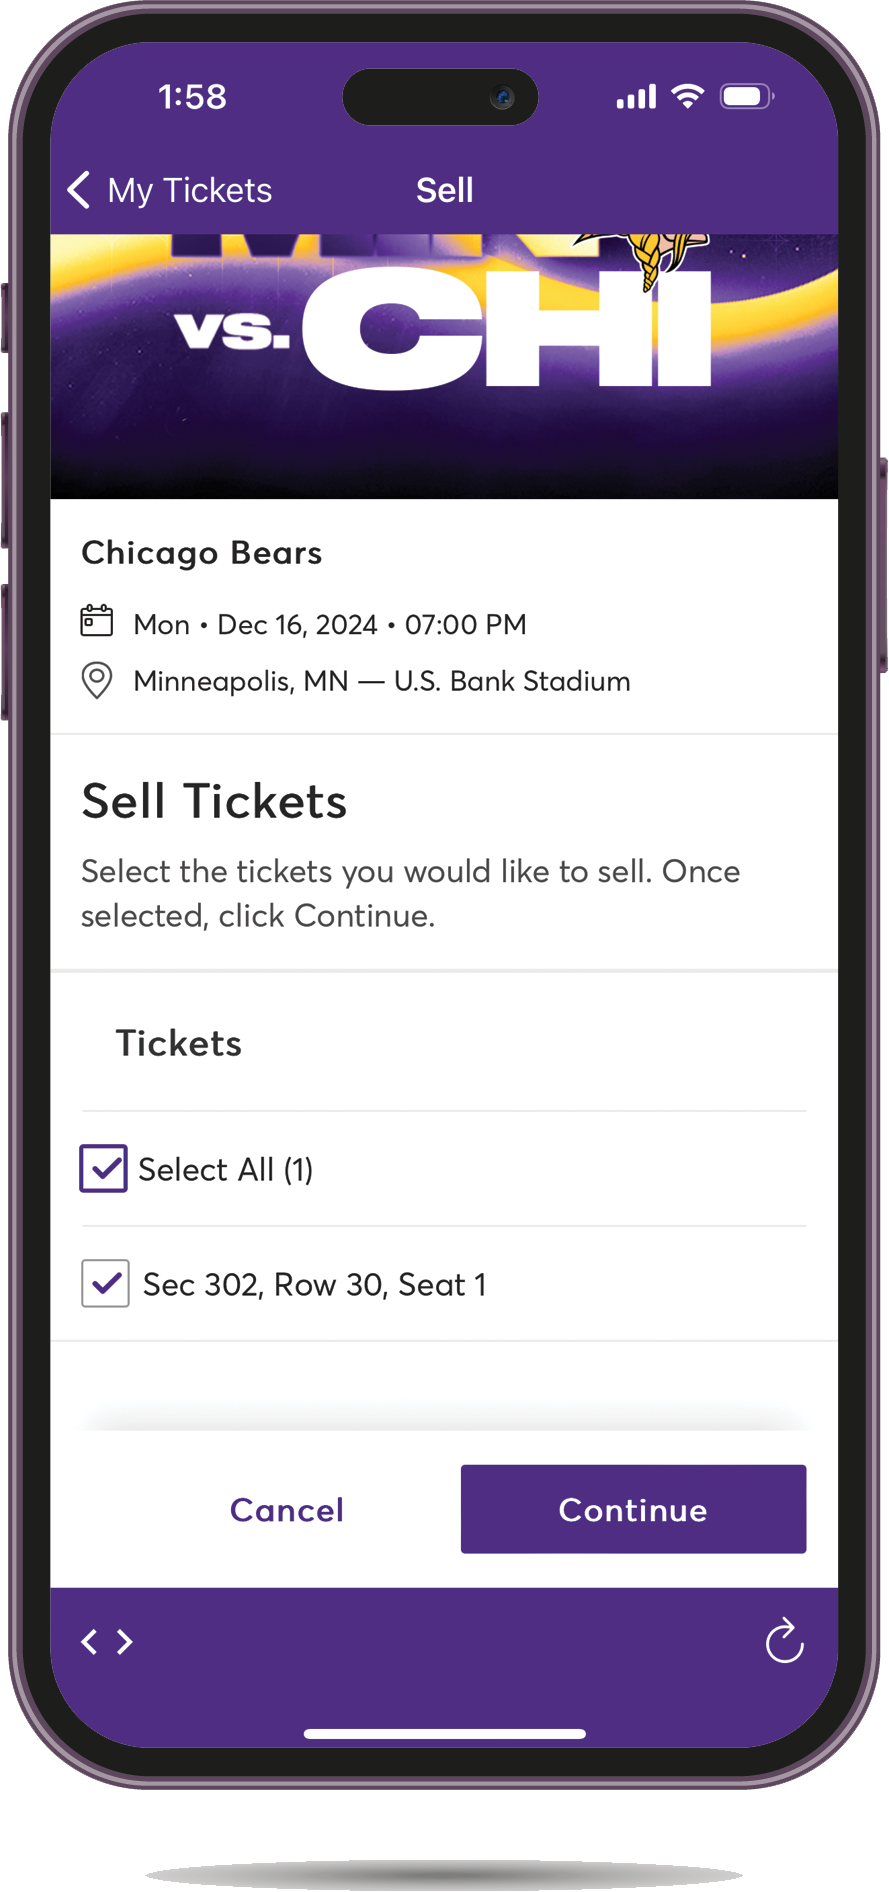
Select the game to sell and select the Sell button

Step 2

Step 2

Choose the ticket(s) you want to sell and click Continue

Step 3

Step 3

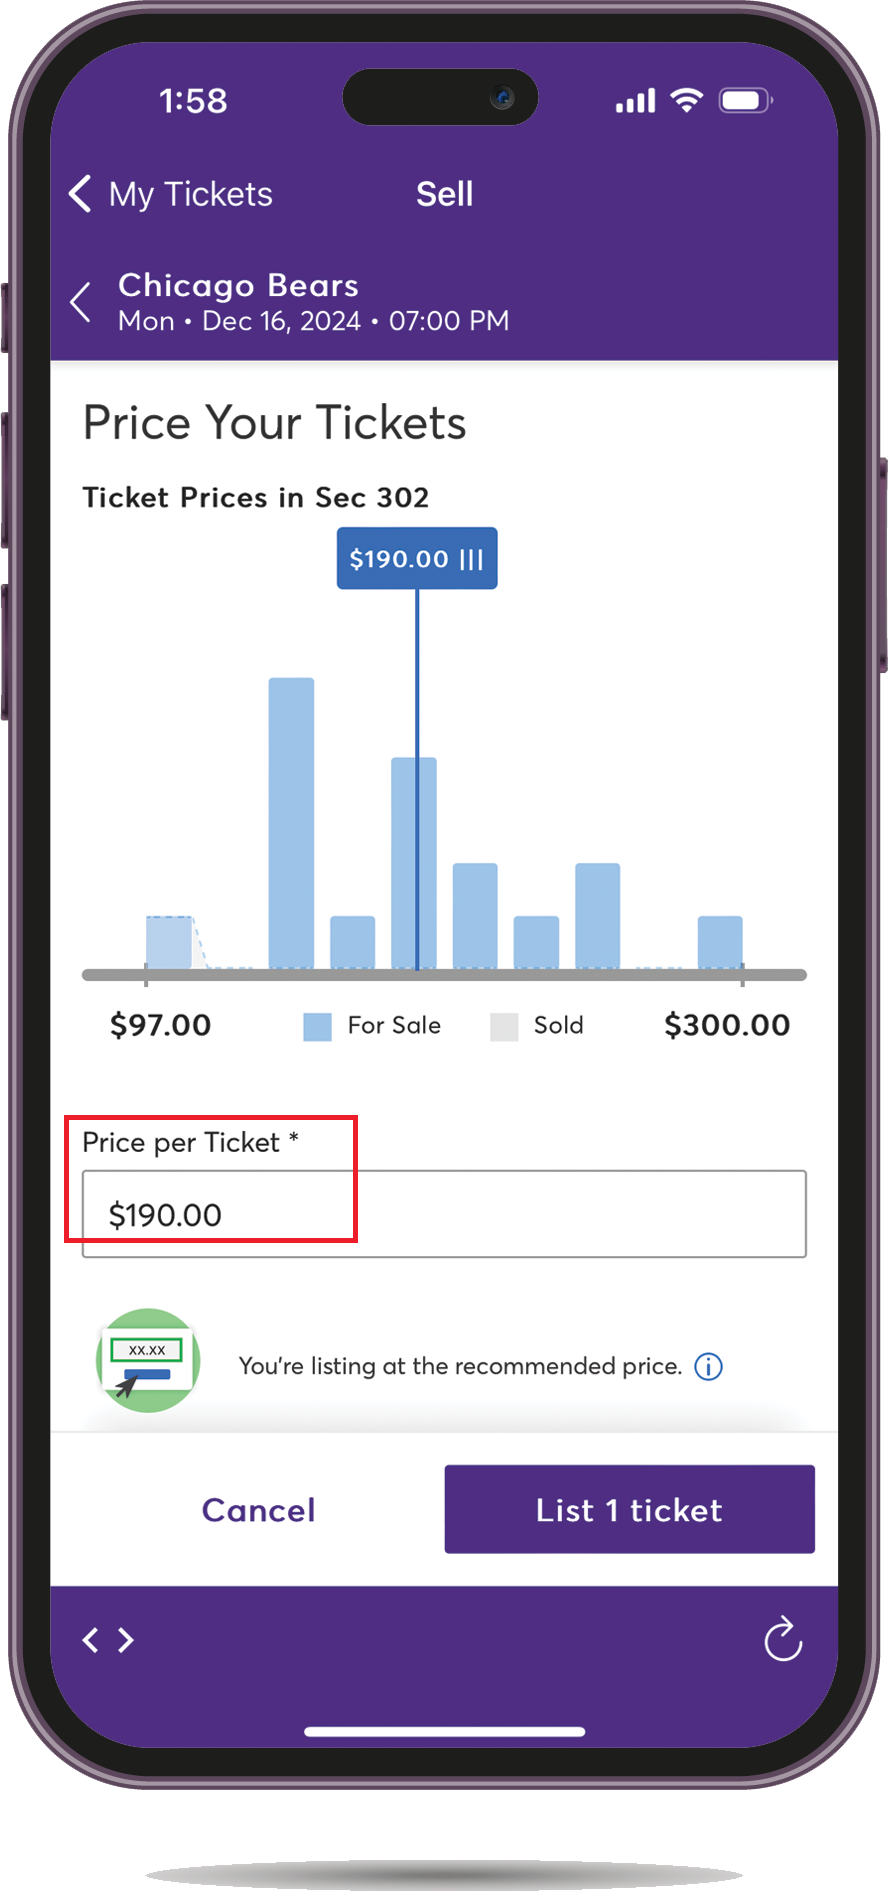
Select the price that you would like to list your ticket(s) for online. The recommended price from the system will list based on inventory available on the NFL Ticket Exchange in similar seats. You can also enter your own price on the line (please note to pay attention to the payout amount and calculation as the amount you list your tickets for is not the exact amount you will be paid out per ticket)

Step 4

Step 4

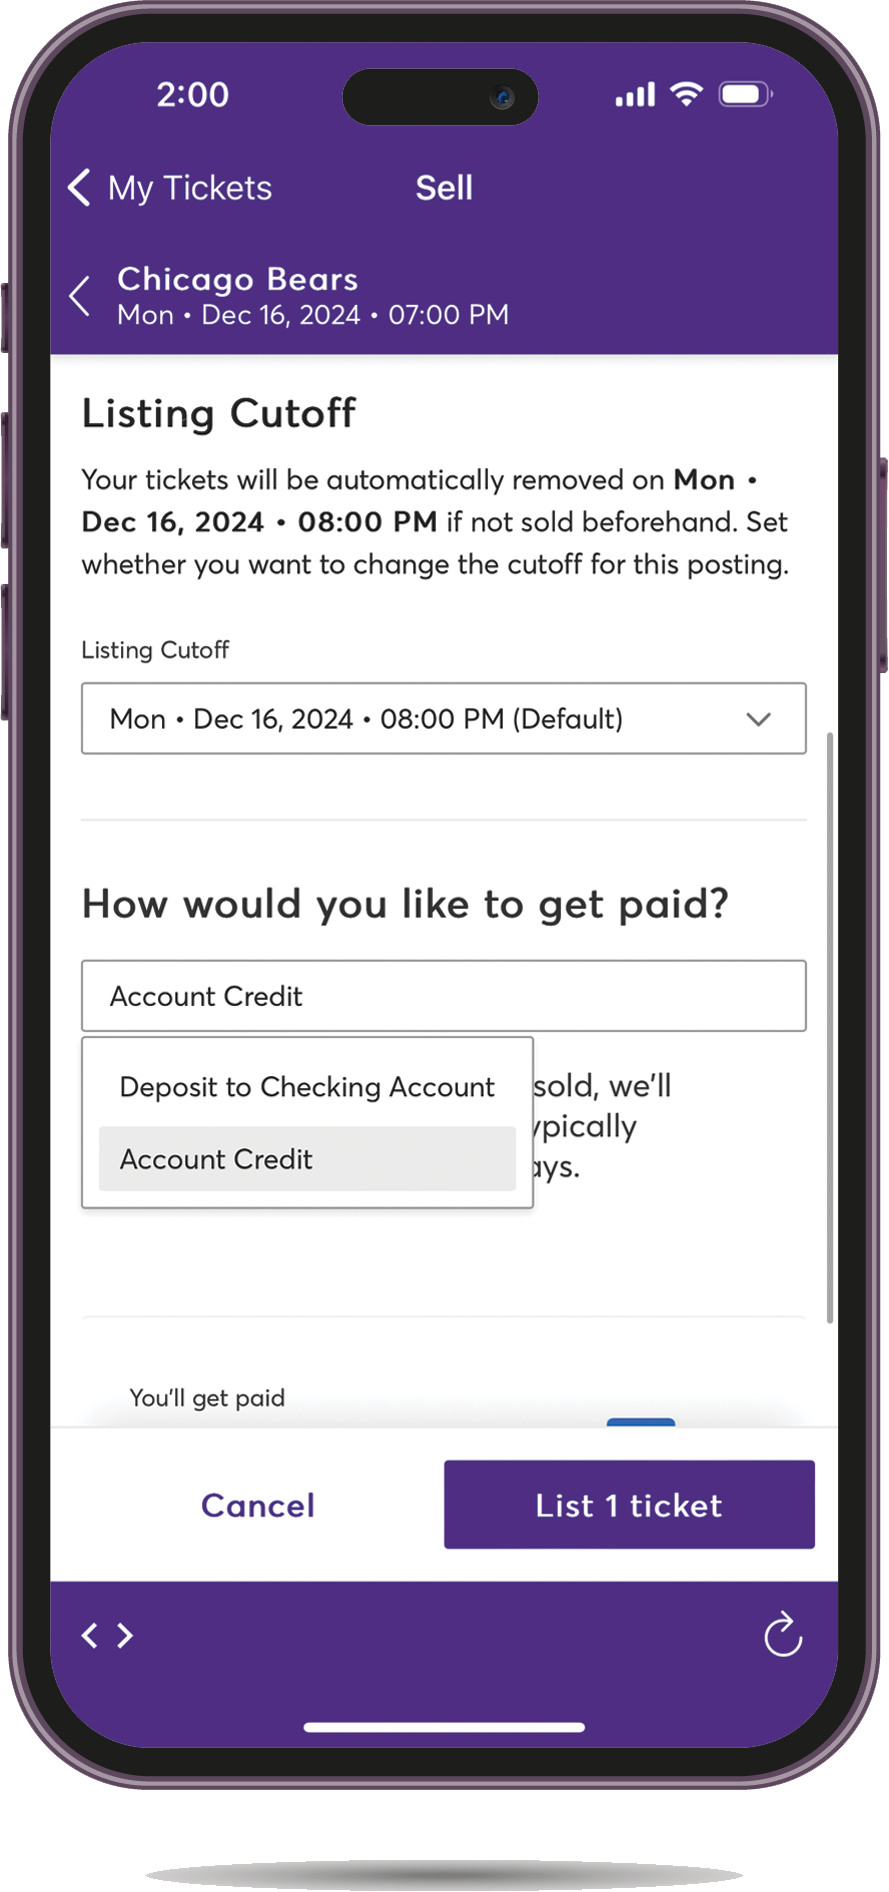
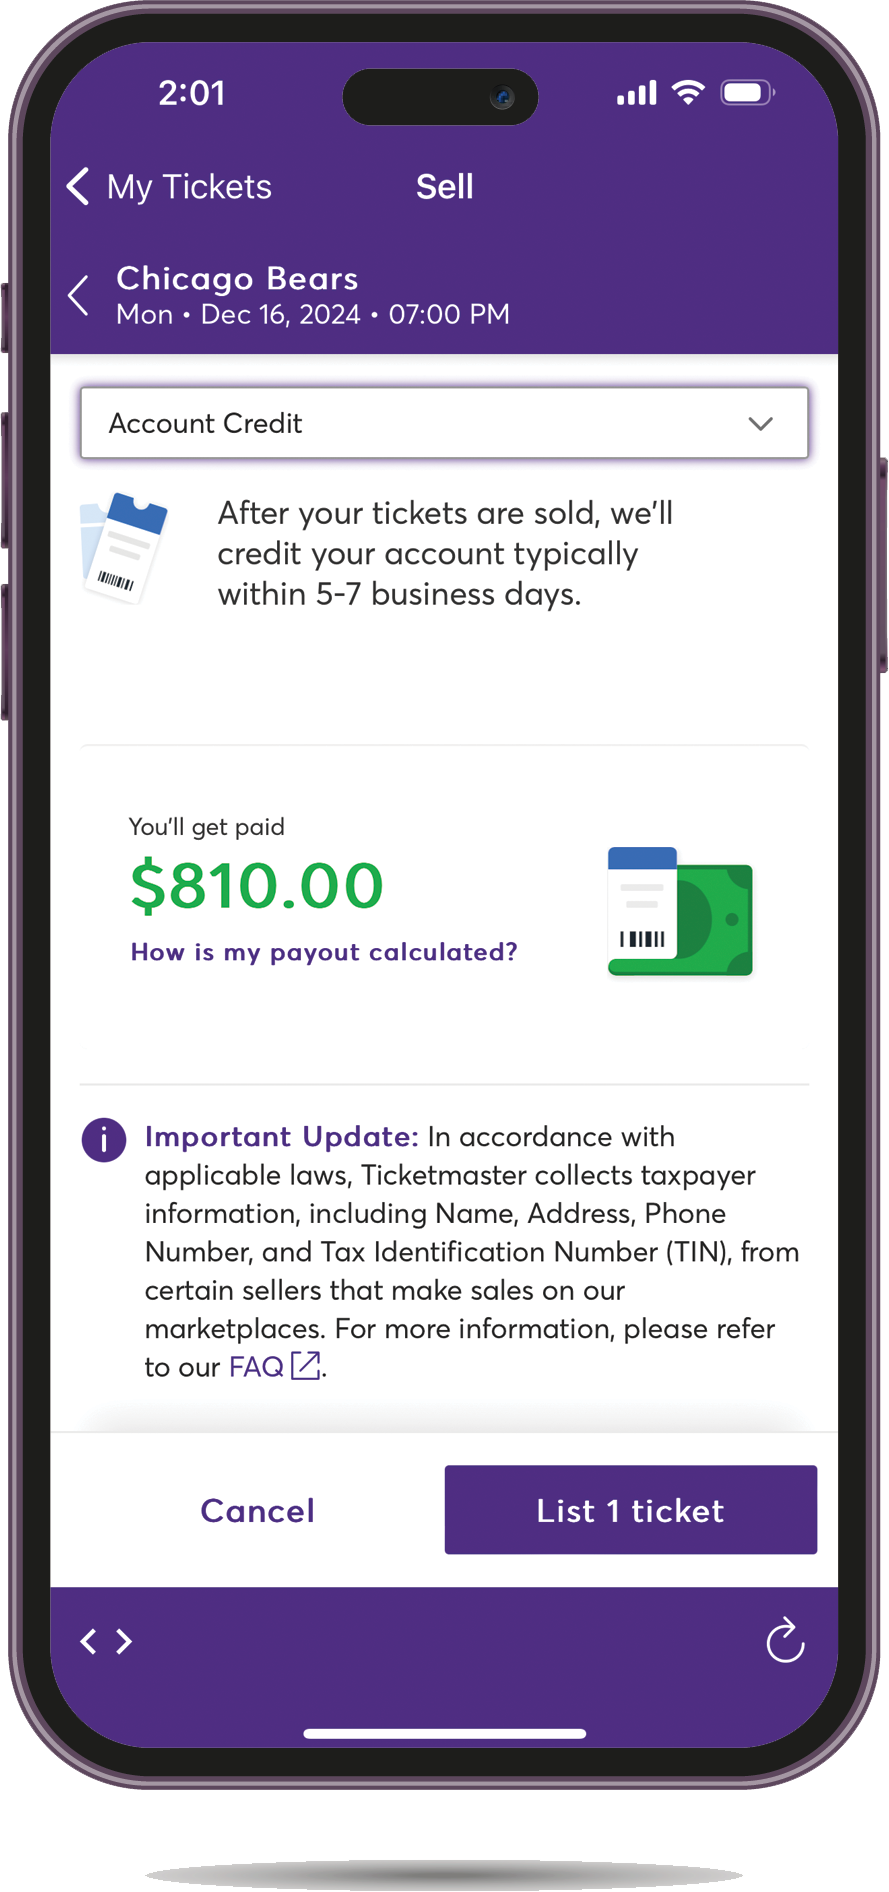
On the same screen, select your Listing Cutoff from the menu (this is when your ticket will be removed automatically from the marketplace) and choose your payout method either Deposit to Your Checking Account (bank information required) or select the funds to remain on your account as an Account Credit to be applied to a future Vikings invoice.

Step 5

Step 5

Click the List Tickets button to list your tickets for sale (make sure to double check your information you entered before listing)

Please Note: Not all tickets are eligible for resale. If they are not, the Sell option will not be shown.

DESKTOP INSTRUCTIONS

How do I access my ticket(s)?

  1. Sign in to your My Vikings Account
  2. Select My Tickets in the navigation or, if the game you are looking to manage is one of the next three upcoming games, scroll down and click the ticket artwork for the event you want to manage.

Please note, there is no printing of PDF tickets.

Ticket barcodes can only be viewed and scanned in on game day from a mobile device. Download the Minnesota Vikings App for the best experience.

How do I transfer my ticket(s)?

  1. Sign in to your My Vikings Account
  2. Select My Tickets in the navigation or, if the game you are looking to manage is one of the next three upcoming games, scroll down and click the ticket artwork for the event you want to manage.
  3. Select the game you wish to transfer by clicking View Event Details
  4. Once in the event, select the Transfer button
  5. Choose the ticket(s) you want to transfer and click Continue
  6. Select the recipient from your already existing contacts, or click Add a New Recipient to create a new contact by entering the required fields
  7. Click the Transfer button to send your tickets to the added recipient (make sure to double check the information you entered)

How do I accept a transfer?

  1. Click the Accept Tickets button from the email you received
  1. Sign in with your email and password for My Vikings Account or create an account. That's it! Once you are in your account your ticket will be accessible for you to manage.

Once you accept a ticket transfer, the email link expires. You cannot access your tickets for game day from an email. Log in to the Minnesota Vikings app to view your barcodes.

How do I sell my ticket(s)?

  1. Sign in to your My Vikings Account
  2. Select My Tickets in the navigation or, if the game you wish to sell is one of the next three games, scroll down and click the ticket artwork for the event you want to manage and skip Step 3
  3. Select the game to sell by clicking View Event Details
  4. Once in the event, select the Sell button
  5. Choose the ticket(s) you want to sell and click Continue
  6. Select the price that you would like to list your ticket(s) for online. The recommended price from the system will list based on inventory available on the NFL Ticket Exchange in similar seats. You can also enter your own price (please note to pay attention to the payout amount and calculation as the amount you list your tickets for is not the exact amount you will be paid out per ticket)
  7. Select your Listing Cutoff from the menu (this is when your ticket will be removed automatically from the marketplace)
  8. Choose your payout method; either Deposit to Your Checking Account (bank information required) or Account Credit to be applied to a future Vikings invoice.
  9. Click the List Tickets button to list your tickets for sale (make sure to double check your information you entered before listing)

* Important Information: In accordance with applicable laws, Ticketmaster collects taxpayer information, including Name, Address, Phone Number, and Tax Identification Number (TIN), from certain sellers that make sales on our marketplaces. For more information, please refer to Ticketmaster's FAQ. After your tickets are sold, your account will be credited typically within 5-7 business days as long as appropriate tax information has been submitted.

How do I donate my ticket(s)?

  1. Sign in to your My Vikings Account
  2. Select My Tickets in the navigation or, if the game you wish to donate is one of the next three games, scroll down and click the ticket artwork for the event you want to manage and skip Step 3
  3. Select the game to send by clicking View Event Details
  4. Once in the event, select the More button to select the Donate option
  5. Choose the ticket(s) you want to donate and click Continue
  6. Select the charity you wish to send the ticket(s) to and click continue to send the tickets to the selected charity (make sure to double check your information you entered)

TROUBLESHOOTING

Having issues logging in your My Vikings account or your Vikings account via the Vikings app?

• Do you have a My Vikings account? Try Sign Up instead of Sign In, the system will prompt you to create an account with your email address or let you know you already have one.

• On a desktop computer, exit out of everything and clear your browsing history or restarting your computer.

• On a desktop computer, make sure your web browser is up to date. Google Chrome works best with the system.

• On a smart phone, logout of the Vikings app and turn your phone off & back on.

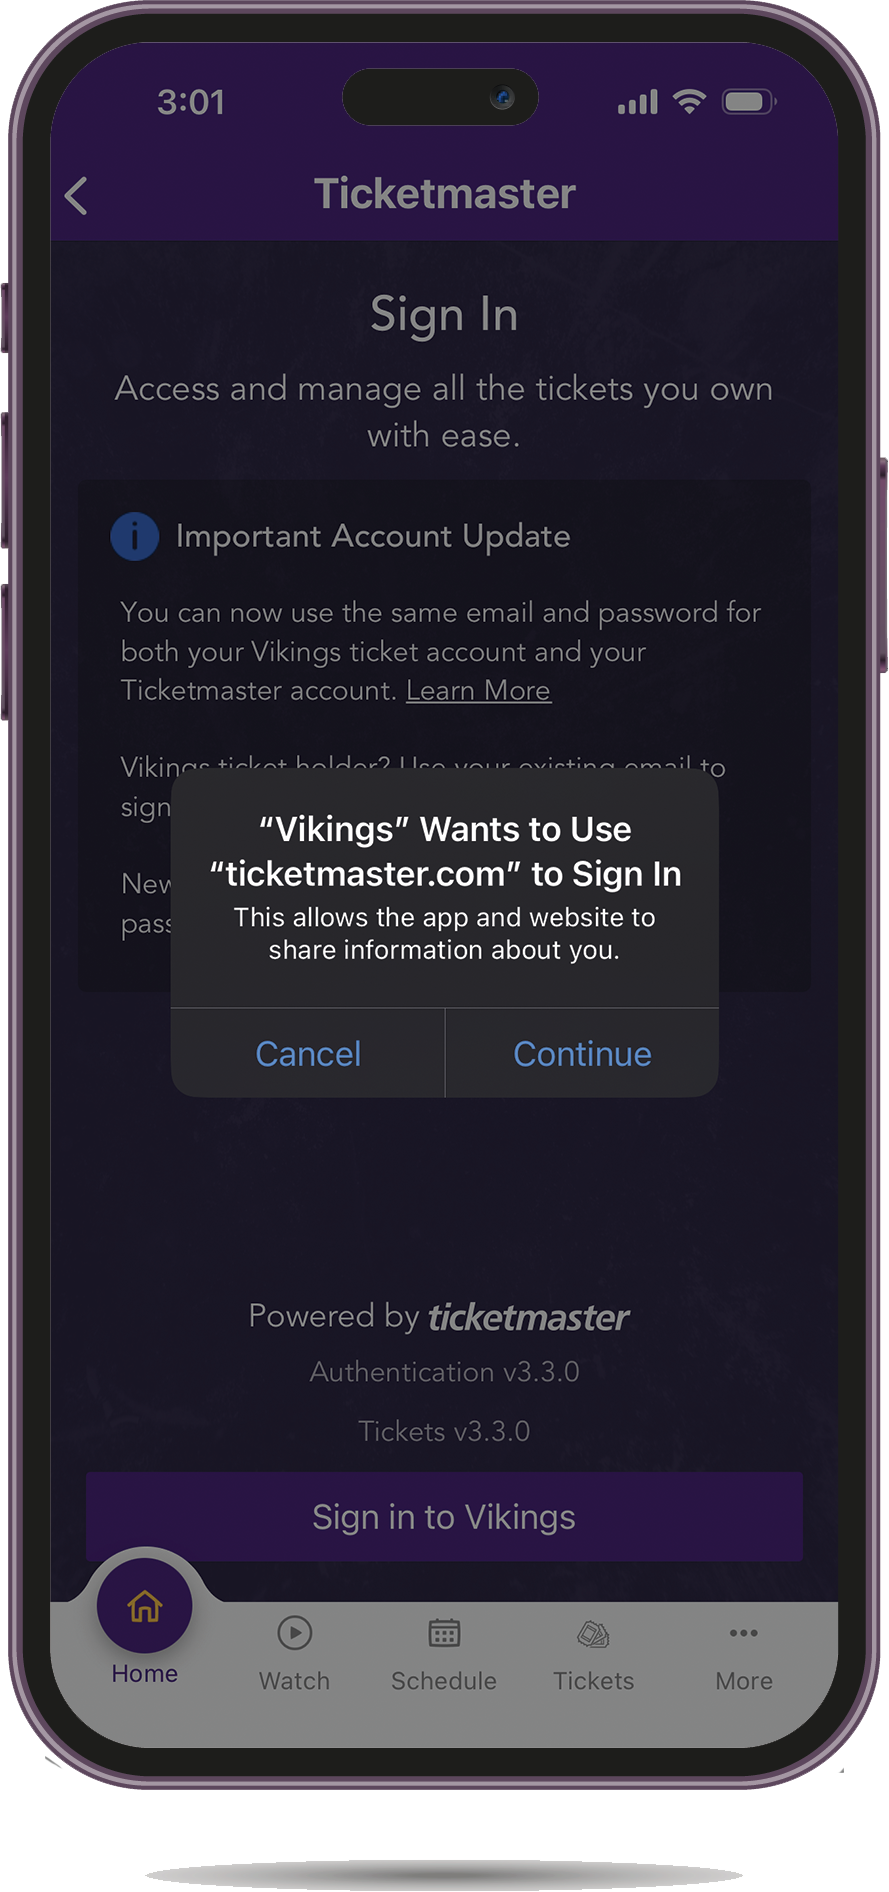
• On a smart phone, are you selecting the Vikings option on top (not Ticketmaster) when you first login? You will need to select "continue" if given the prompt: "Vikings" Wants to Use "ticketmaster.com" to Sign In. This allows the app and website to share information about you.

• On a smart phone, is your Vikings app updated? You may need to delete and re-install the app.

• If you clicked on "accept tickets" in the transfer email and get an expired message, you've likely already claimed the tickets and can now login your same account on the Vikings app to view your barcodes.

• If you sent an email and the recipient hasn't received it, you likely mistyped their email address and need to reclaim and resend the transfer offer using your account or app.

• When creating your My Vikings account, did you spell your own email address correctly? The system will have you go through a two-step verification of your email address and phone number.

NFL Ticket Exchange FAQ

NFL Ticket Exchange FAQ

Get information on how to buy and sell your tickets via NFL Ticket Exchange, the official ticket exchange of the NFL.

Important Tips for the Vikings App

• Join the free stadium Wi-Fi named: #USBANKSTADIUM

• Access your ticket(s) in the App and verify the QR code(s) are visible

• Add tickets to your Apple or Android Wallet

• Have your phone out as you are approach the PORT (ticket scanner)

• Turn your screen brightness up all the way

• Swipe right to access and scan more tickets

• Screen shots of tickets will not scan and there is no printing of tickets

HOW TO PRINT YOUR SEASON TICKET INVOICE

• Step 1: Log into My Vikings Account with your email and password. Click Forgot Password, if necessary.

• Step 2: On the right side, select the invoice you want to print or view.

• Step 3: Once you see the invoice details/summary, click the blue "Print" button to download a PDF of the invoice and print it. Click the blue "Email" button to immediately send an email invoice confirmation to the email address listed on the My Vikings Account.

HOW TO ACCESS AND PAY YOUR INVOICE
Step 1: Log in to My Vikings Account with your email and password.

Step 2: Click on Pay Invoice button on the main page or the Invoices tab in the upper menu.

Step 3: Review your seat location and the invoice summary, then select the continue button.

Step 4: Choose your Payment Option. Select Pay in Full from the dropdown menu. If you wish to pay half now, click 2023 Season Ticket Payment Plan. The second installment will be automatically withdrawn on the second payment deadline.

- You can also can select either plan above with Playoff Sign Up. This is a benefit to you as a Vikings Season Ticket Member to reserve your seat location for any playoff game(s) we host at U.S. Bank Stadium. By signing up today you will secure the Wild Card Game (if hosted) at the average price of your ticket based on a 10 game season (your total per seat season ticket price divided by 10). There is no payment for playoff tickets due at this time, your card will be automatically charged once we are assured of a home playoff game. Divisional and NFC Championship game prices will be released at a later date.

Step 5: Review or select your payment method. You can select Edit/Add to make changes or add a new a Credit or Debit Card. Enter your CVV to confirm the card.

Step 6: Select the check box to accept the terms & conditions and click the "Pay Now" button which should become highlighted in purple once all above steps are complete.

If you selected the "Payment Plan" or "Payment Plan & Playoff Sign Up" half of the invoice total is charged now and the final half is automatically processed Friday, April 7th on the same credit card.

Website_MyVikingsAccount19

My Vikings Account is your personal dashboard for tickets. On this website you can manage your tickets: transfer, sell, or donate to charity. Use the Vikings App for entry to U.S. Bank Stadium. Make sure to select "View Barcode" on your ticket(s) and parking before you arrive downtown. Screen shots are prohibited and will not scan.